“Indulge in the simplicity and delight of homemade vanilla ice cream with this easy-to-follow recipe. Discover the perfect balance of creamy richness and sweet vanilla flavor, creating a frozen treat that is sure to satisfy your taste buds. Get ready to elevate your dessert game with this classic favorite!”
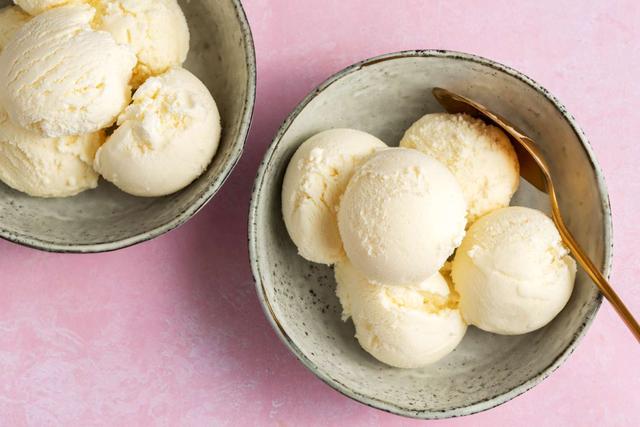
The Best Homemade Vanilla Ice Cream (Custard-Style)
")
This homemade vanilla ice cream recipe uses a custard-style base with eggs, resulting in a creamy and deliciously scoopable ice cream. It serves as the foundation for all great ice creams, allowing you to easily add various flavorings and create countless variations.
For this recipe, it is recommended to use an ice cream maker. Ensure that the barrel of the ice cream maker is frozen ahead of time. The custard base is made by combining milk, salt, and sugar in a saucepan over medium heat until it simmers. In a separate bowl, whisk together egg yolks and sugar, then slowly mix in a portion of the milk mixture to temper the eggs. Pour the egg mixture back into the saucepan and heat until slightly thickened. Be careful not to boil the mixture as it may result in scrambled eggs.
Afterward, transfer the custard mixture to a bowl or container and cool it down either in the refrigerator or by placing it over another bowl filled with ice. Once completely cooled, stir in half and half or heavy cream (depending on your preference) and vanilla extract. Pour the mixture into your ice cream maker and churn according to its instructions. Finally, store the finished ice cream in a freezer container or loaf pan.
Ingredients You Need
– 2 cups (473 ml) half and half or heavy cream
– 1 cup (237 ml) whole milk
– 1/4 teaspoon salt
– 3/4 cup (150g) granulated sugar
– 4 large egg yolks
– 2 teaspoons vanilla extract
How to Make Vanilla Ice Cream
This homemade vanilla ice cream recipe uses a custard-style base made with eggs, resulting in a creamy and delicious dessert. To start, combine milk, salt, and half of the sugar in a saucepan over medium heat. Stir constantly until the mixture reaches a simmer, but be careful not to boil it. Remove from heat.
In a separate small bowl, whisk together egg yolks and the remaining sugar until combined. Slowly drizzle 1/2 cup of the hot milk mixture into the egg mixture, stirring continuously to prevent scrambling the eggs. Pour this tempered egg mixture back into the saucepan with the remaining milk mixture.
Heat the combined mixture over medium heat until slightly thickened, about 3-5 minutes. Be sure not to let it boil, as this can result in scrambled eggs. Remove from heat and pour the custard into a bowl or container.
To cool down the custard quickly without putting it directly in the refrigerator, place the bowl over another bowl filled with ice for 10-15 minutes. Once cooled, refrigerate for at least two hours until cold.
Once chilled, stir in half and half or heavy cream (whichever you prefer) and vanilla extract into the custard mixture. Pour this final mixture into an ice cream maker and churn according to the manufacturer’s instructions.
If you don’t have an ice cream maker, you can still make this recipe by freezing the custard in ice cube trays until solid. Then blend these cubes with more heavy cream until smooth using a blender when ready to serve.
Step One: Heat the Milk Mixture
Step One: Heat the Milk Mixture
In a saucepan over medium heat, combine the milk, salt, and half of the sugar. Stir the mixture constantly as you bring it just to a simmer. Be careful not to let it boil.
Step Two: Temper the Eggs
In a small bowl, whisk together the egg yolks and remaining sugar until combined. Slowly stir in 1/2 cup of the hot milk mixture into the egg mixture in a drizzle. This process is called tempering, and it helps prevent the eggs from cooking too quickly.
Step Three: Combine Egg Mixture with Milk Mixture
Pour the tempered egg mixture back into the saucepan with the hot milk mixture. Heat over medium heat until slightly thickened, about 3-5 minutes. Be careful not to let it boil.
Step Four: Chill the Custard Mixture
Pour the custard mixture into a bowl or container. If you don’t want to put hot liquid directly in your refrigerator, you can place the bowl over another bowl filled with ice for about 10-15 minutes to cool it down first. Then refrigerate for at least two hours, or until cold.
Step Five: Add Half and Half (or Heavy Cream) and Vanilla
Once the custard mixture has completely cooled, stir in your choice of half and half or heavy cream (whichever you prefer) and vanilla extract. This will give your ice cream its creamy texture and delicious flavor.
Step Six: Churn in an Ice Cream Maker
Pour your ice cream base into an ice cream maker and churn according to the manufacturer’s instructions. The freezing process helps incorporate air into the mixture, giving your ice cream a light and creamy texture.
Step Seven: Freeze Your Ice Cream
After churning, transfer your ice cream to a freezer container or loaf pan and store it in the freezer until firm. This may take several hours or overnight, depending on your freezer temperature.
Step Eight: Enjoy Your Homemade Ice Cream!
Once your ice cream is fully frozen, it’s ready to be scooped and enjoyed. Serve it in bowls, cones, or use it as a base for other desserts like sundaes or milkshakes. Get creative with mix-ins and toppings to customize your homemade ice cream to your liking.
Step Two: Temper the Egg Mixture
Step Two: Temper the Egg Mixture
To temper the eggs, slowly add 1/2 cup of the milk mixture in a drizzle into the egg mixture. It’s important to do this slowly so as not to cook the eggs. Gradually pour the entire egg mixture back into the saucepan with the milk mixture. Simmer over medium heat for about 3-5 minutes, making sure not to let it boil. The goal is to slightly thicken the mixture.
Step Three: Chill the Custard Mixture
Pour the cooled custard mixture into a chilled bowl and refrigerate for about two hours until it’s cold. An alternative method is to cool it down quickly by placing the bowl over another bowl filled with ice for 10-15 minutes. This step is important to ensure that your ice cream freezes properly and has a smooth texture.
Step Four: Add Half and Half or Heavy Cream
When you’re ready to churn the ice cream, add either half and half or heavy cream (depending on your preference) along with vanilla extract to the custard mixture. The amount of half and half or heavy cream should be 2 cups (473 ml). This will contribute to the creamy consistency of your ice cream.
Step Five: Churn the Ice Cream
Pour the custard mixture into your ice cream maker and churn according to its instructions. The churning process helps incorporate air into the mixture and freezes it faster, resulting in a smoother texture. Follow your ice cream maker’s guidelines for how long it typically takes.
Once your ice cream reaches a thick consistency, transfer it to a freezer container or loaf pan and store it in the freezer until completely frozen. This may take several hours or overnight, depending on your freezer settings.
By following these steps, you’ll be able to make delicious homemade vanilla ice cream using a custard-style base. Feel free to experiment with different flavorings or mix-ins to create unique variations of this classic treat.
Step Three: Combine and Thicken
Step Three: Combine and Thicken
In a saucepan over medium heat, combine the milk, salt, and half of the sugar. Stir the mixture constantly as you bring it just to a simmer. Be careful not to let it boil.
While the milk mixture is heating, whisk together the egg yolks and remaining sugar in a small bowl until combined. This will be used to temper the eggs so they don’t cook when added to the hot milk mixture.
Slowly drizzle 1/2 cup of the hot milk mixture into the egg yolks while whisking continuously. This process, known as tempering, helps bring the temperature of the eggs up slowly without cooking them.
Pour the tempered egg mixture back into the saucepan with the milk mixture. Heat over medium heat until slightly thickened, about 3-5 minutes. It’s important not to let it boil, as this could result in scrambled eggs.
Once thickened, pour the custard mixture into a bowl or container. To cool it down quickly without putting it directly in the refrigerator, place it over another bowl filled with ice for 10-15 minutes.
Refrigerate the custard mixture for at least two hours or until completely cold. This step is crucial for achieving a creamy texture in your ice cream.
After refrigeration, stir in the half and half or heavy cream (whichever you prefer) and vanilla extract. This will further enhance the creaminess and flavor of your ice cream base.
Now you’re ready to churn your ice cream using an ice cream maker according to its manufacturer’s instructions. Churn until thick and creamy.
If you don’t have an ice cream maker, you can still make this recipe by freezing individual portions of your custard mixture in ice cube trays until solid. Then blend these frozen cubes with additional heavy cream in a blender until smooth.
Regardless of which method you choose, store your homemade vanilla ice cream in a freezer container or loaf pan and freeze until fully set.
Enjoy your creamy and delicious homemade vanilla ice cream, ready to be enjoyed plain or with your favorite mix-ins or toppings.
Step Four: Chill the Mixture
Step Four: Chill the Mixture
After you have heated and thickened the custard mixture, it’s important to chill it before churning it in the ice cream maker. This step allows the flavors to meld together and for the mixture to cool down completely.
To chill the mixture, pour it into a bowl or container and place it in the refrigerator for at least two hours, until it’s cold. If you don’t want to put the hot mixture directly in the refrigerator, you can cool it down first by placing the bowl over another bowl filled with ice for 10-15 minutes.
Chilling the mixture is a crucial step in making homemade ice cream as it ensures that the ice cream freezes properly and has a smooth texture. Once the mixture is cold, you’re ready to move on to the next step of churning it in your ice cream maker.
Step Five: Churn the Ice Cream
Step Five: Churn the Ice Cream
Once the ice cream base mixture has completely cooled, it’s time to churn it in your ice cream maker. If you’re using an ice cream maker, simply pour the mixture into the machine and churn according to the manufacturer’s instructions. The churning process helps incorporate air into the mixture, resulting in a light and creamy texture.
If you don’t have an ice cream maker, don’t worry! You can still make this homemade vanilla ice cream without one. After cooling the custard mixture, stir in only half of the heavy cream or half and half. Reserve the remaining amount. Pour the mixture into ice cube trays and freeze until solid. When ready to eat, add the frozen ice cream cubes to a blender along with the remaining heavy cream or half and half. Blend until smooth and creamy.
Churning the ice cream in an ice cream maker is preferred as it helps create a faster freezing process and results in a super creamy texture. However, if you don’t have one, there are alternative methods to achieve a delicious homemade ice cream.
Remember, this custard-style base is versatile and can be used as a starting point for adding any flavorings or mix-ins you desire. Get creative and experiment with different flavors like chocolate, coffee, fruit purees, or even candy pieces.
Enjoy your homemade vanilla ice cream straight from the freezer or use it as a base for creating decadent sundaes or milkshakes. The possibilities are endless!
Frequently Asked Questions
1. Does this ice cream have to be made in an ice cream maker?
No, you can still make this ice cream without an ice cream maker. Simply pour the mixture into ice cube trays and freeze until solid. When ready to eat, blend the frozen cubes with the remaining heavy cream until smooth.
2. Can I add flavoring to the ice cream besides vanilla?
Absolutely! Once you have mastered the base recipe, you can add any flavoring or fruit that you like to customize your ice cream. Some popular options include chocolate, peanut butter, strawberries, blueberries, and mango.
3. How much ice cream does this recipe make?
This recipe makes half a gallon of ice cream.
4. Can I double the recipe?
Yes, you can double the recipe if you need to make more ice cream for a larger group. Just be sure that your ice cream maker is large enough to hold the doubled amount.
Does this ice cream have to be made in an ice cream maker?
No, this ice cream recipe can be made without an ice cream maker. If you don’t have an ice cream maker, you can pour the mixture into ice cube trays and freeze until solid. Then, blend the frozen cubes with the remaining half and half or heavy cream until smooth. While using an ice cream maker will result in a smoother and creamier texture, you can still enjoy homemade ice cream without one.
Absolutely! Once you have the custard-style base prepared, you can add any flavoring you like to customize your homemade ice cream. Whether it’s chocolate chips, fruit puree, cookies, or even nuts, feel free to get creative and experiment with different flavors and mix-ins. The possibilities are endless!
This recipe makes half a gallon of ice cream.
Yes, you can double this recipe if you need a larger quantity of ice cream. Just make sure your ice cream maker can accommodate the increased volume. Doubling the recipe should not affect the quality or taste of the final product.
To make this homemade vanilla ice cream, you will need milk, salt, sugar, egg yolks, half and half or heavy cream (depending on your preference), and vanilla extract. These ingredients combine to create a creamy and delicious custard-style base for your homemade ice cream.
The main difference between Vanilla and French Vanilla lies in the addition of egg yolks. French Vanilla ice cream uses a custard-style base with egg yolks, resulting in a richer and creamier texture compared to regular Vanilla ice cream. French Vanilla also has a stronger vanilla flavor. Both variations are delicious and can be used as a base for various flavors and mix-ins.
Do I have to add eggs to the ice cream?
Eggs are not a required ingredient for making ice cream. While this recipe uses a custard-style base with eggs, there are plenty of egg-free ice cream recipes available. In fact, the article even provides a link to a chocolate ice cream recipe that doesn’t include eggs. So, if you prefer not to use eggs in your ice cream, you can definitely find alternative recipes to try.
Absolutely! This homemade vanilla ice cream recipe serves as the base for hundreds of different flavors. Once you’ve mastered this recipe, you can easily customize it by adding any flavorings or mix-ins that you like. The article suggests various flavors such as chocolate chocolate chip, cookies and cream, mint chocolate chip, and more. You can also experiment with different fruits or other flavorings like peanut butter or Snickers. The possibilities are endless!
While using an ice cream maker is preferred for this recipe to achieve a creamy texture and faster freezing time, it is still possible to make this homemade vanilla ice cream without one. The article provides an alternative method where you freeze the mixture in ice cube trays and then blend it with the remaining dairy component in a blender until smooth. This method may require additional steps and time, but it allows you to enjoy homemade ice cream even without an ice cream maker.
Can I add flavoring to the ice cream besides vanilla?
Yes, you can definitely add flavoring to the ice cream besides vanilla. Once you have the custard-style base made, you can add any flavoring or fruit that you like. Some popular options include chocolate, peanut butter, strawberries, blueberries, mango, and even candy bars like Snickers. You can get creative and experiment with different flavors to make your own unique ice cream creations.
Adding flavorings is a great way to change up the taste of your homemade ice cream and create a variety of flavors. Just make sure to add them after the custard base has cooled down and before pouring it into the ice cream maker. This will ensure that the flavors are well incorporated into the mixture.
So go ahead and let your imagination run wild when it comes to adding flavorings to your homemade ice cream. The possibilities are endless!
What Ice Cream Maker to Use?
To make this homemade vanilla ice cream, it is recommended to use an ice cream maker. The recipe suggests using the Cuisinart 1.5 quart ice cream maker, which is known for producing consistently great results. This ice cream maker is compact and comes in different colors, making it a stylish addition to any kitchen.
If you prefer a more professional model with additional features, the Cuisinart ICE-70 Electronic Ice Cream Maker is recommended. It has a larger capacity of 2 quarts and includes an LCD screen and three settings for easier control. This model also has an improved paddle for faster processing time.
In conclusion, this vanilla ice cream recipe offers a simple and delicious way to enjoy the classic flavor. With just a few ingredients and easy steps, anyone can create a creamy and smooth homemade treat that will satisfy any sweet tooth. Whether enjoyed on its own or paired with toppings, this recipe guarantees a delightful dessert experience.
Learn More About Grilling
If you want to learn more about grilling, check out these other helpful resources!