Learn how to transform an ordinary drum into a functional and stylish smoker with our step-by-step guide on making an Ugly Drum Smoker. Discover the key materials, tools, and techniques needed to create your own budget-friendly smoking apparatus for delicious barbecue results every time.
What Is A Barrell Smoker? Why Would You Want One?
A barrel smoker, also known as a drum smoker, is a type of smoker that is built using a 55-gallon drum or barrel. It is a popular choice for anyone new to smoking because it offers an easy way to cook food without too much worry. The vertical design of the drum smoker allows for even heat distribution and ensures that all the flavors and juices are continually circulating in the grill.
One of the main advantages of a barrel smoker is its ability to cook food faster than traditional smokers. This is due to the moisture from the meat dripping onto the heat deflectors, creating humidity that helps to keep the meat moist while it cooks. The end result is incredibly flavorful and juicy food that will leave you wondering why you didn’t make the switch sooner.
So why would you want to build your own barrel smoker instead of buying one? First, building your own gives you the opportunity to customize and add your personal flair to the cooker. It becomes a unique piece that reflects your style and skills as a DIY enthusiast. Second, building your own can save you several hundred dollars compared to buying a pre-made drum smoker from a manufacturer.
Building a barrel smoker requires some preparation, including burning off the paint on the outside of the barrel and cleaning it thoroughly. Once cleaned, you can proceed with painting both the inside and outside of the barrel with high-temperature BBQ paint. You can choose different colors for accent parts if desired.
Overall, building your own barrel smoker is not only a practical and cost-effective option but also an opportunity to showcase your handyman skills and impress your friends with your homemade creation.
Drum / Barrell Smokers Explained
A drum smoker, also known as a barrel smoker, is a type of smoker that is made from a 55-gallon drum or barrel. It is a popular choice for smoking food because of its simplicity and efficiency. The design of the drum smoker allows for low and slow cooking, which is ideal for producing tender and flavorful meats.
One of the key features of a drum smoker is its vertical cooking style. This means that the food is placed on grates that are stacked vertically inside the drum, allowing for even heat distribution and smoke circulation. The vertical design also helps to save space, making it suitable for smaller outdoor areas.
In terms of functionality, a drum smoker operates similarly to other types of smokers. It uses indirect heat to cook the food, meaning that the heat source is separate from the cooking chamber. This allows for more controlled temperature regulation and prevents direct contact between the flames and the food.
1. Food Tastes Amazing – Even From A Drum
1. Food Tastes Amazing – Even From A Drum
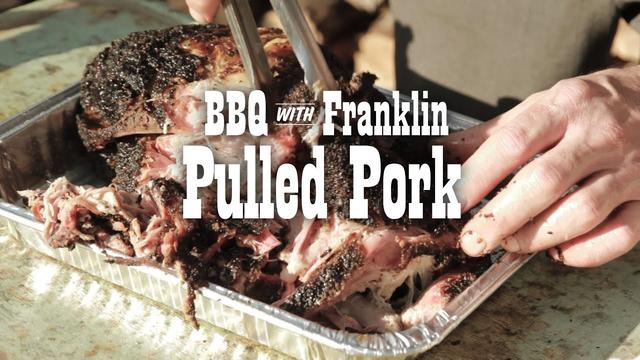
One of the main reasons to build your own drum smoker is because the food it produces tastes incredible. The low and slow cooking method used in drum smokers allows the flavors to develop slowly, resulting in tender and flavorful meats. The moisture from the meat drips onto the heat deflectors, creating a humidity that keeps the meat moist throughout the cooking process. The end result is juicy, smoky, and delicious BBQ that will impress your friends and family.
2. Customization Options Galore
When you build your own drum smoker, you have the opportunity to customize it to your liking. Whether it’s adding personalized touches or choosing specific parts and accessories, you can put your personal flair on the smoker. Additionally, you can choose different colors for paint, handles, and other exterior components, making your drum smoker a unique and eye-catching piece of equipment.
3. Cost Savings
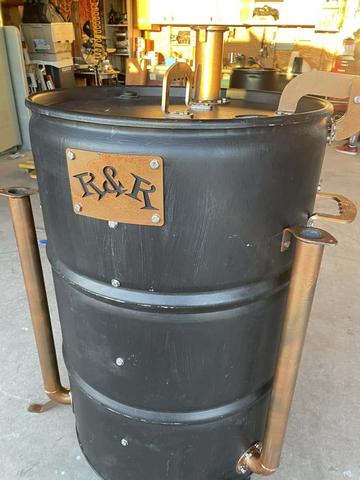
Building your own drum smoker can save you a significant amount of money compared to buying a pre-made one from a brand. While a premium brand like Gateway Drum Smokers can cost over $1,000 USD, building your own with parts from R&R Smokers can be done for around $300-400 USD plus the cost of paint. This cost savings allows you to invest in high-quality materials and components while still staying within budget.
4. Sense of Accomplishment
There’s something incredibly satisfying about completing a DIY project and being able to say “I made it myself.” Building your own drum smoker allows you to showcase your handyman skills and craftsmanship. It’s an accomplishment that you can take pride in every time you fire up your homemade smoker and serve mouthwatering BBQ to your friends and family.
5. Learning Experience
Building a drum smoker is not only a fun project but also an opportunity to learn new skills. From burning out the liner of the barrel to drilling holes and assembling the components, you’ll gain hands-on experience in various aspects of construction. This knowledge can be applied to future DIY projects or even inspire you to explore other areas of craftsmanship.
In conclusion, building your own drum smoker offers a range of benefits, including amazing tasting food, customization options, cost savings, a sense of accomplishment, and a valuable learning experience. It’s a project that allows you to create a unique and functional piece of equipment that will enhance your BBQ game for years to come.
2. They Look Impressive And Are Conversational
2. They Look Impressive And Are Conversational
One of the reasons why building a barrel smoker is worth the effort is because they look impressive and become a great conversation starter. When you have friends over for a barbecue, they will be amazed by your DIY skills and the unique design of your homemade smoker. It’s like having a piece of functional art in your backyard.
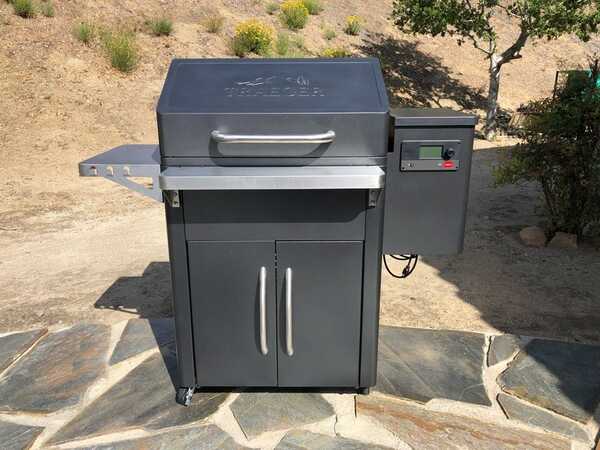
The vertical drum smoker has a sleek and modern look, resembling a sideways Traeger grill. It stands out among the traditional gas grills and adds a touch of sophistication to your outdoor cooking area. Your friends will be curious about how you built it and will want to know all the details of your project.
Not only does it impress your friends, but it also sparks conversations about different cooking methods and techniques. People are always interested in learning about new ways to enhance their grilling experience, and your barrel smoker will definitely pique their curiosity. You can share tips and tricks with them or even host barbecuing workshops to show off your skills.
By building your own barrel smoker, you not only create an impressive piece of equipment but also become part of a community of grillers who appreciate craftsmanship and innovation. It’s a great way to connect with like-minded individuals and share your passion for barbecue. So go ahead and build that barrel smoker – it’s guaranteed to make an impression!
Should I Just Buy a Drum Smoker? Why Build One?
Building your own drum smoker offers several advantages over buying one from a leading brand. First, it gives you the opportunity to customize and personalize your smoker according to your preferences. You can add your own personal flair and make it truly unique. Additionally, building your own smoker allows you to save money compared to purchasing a pre-made one. A drum smoker kit from R&R Smokers costs around $300-400 USD, whereas a premium welded version from Gateway Drum Smokers starts at $1,199 USD.
Moreover, building a barrel smoker is a rewarding DIY project that adds to your repertoire of handyman skills. It allows you to showcase your craftsmanship and impress your friends. There’s something satisfying about being able to say “I made it” when someone asks where you got your drum smoker.
Furthermore, drum smokers offer excellent cooking performance. They cook food faster than traditional smokers due to the moisture from the meat dripping onto the heat deflectors and creating humidity that keeps the meat moist while it cooks. The flavors and juices continuously circulate in the grill, resulting in incredibly tasty food that rivals that of a gas grill.
Building a 55-Gallon Barrel Smoker – A DIY Journey in Fire and Metal
Building your own drum smoker can be a rewarding and cost-effective project for BBQ enthusiasts. While you can purchase a finished drum smoker from top brands, the appeal of customization and personal flair makes building your own an attractive option. With the help of R&R Smokers, a Canadian company specializing in hardware and accessories for custom smoker builds, this detailed guide will walk you through the process.
Kamado grills and pellet style grills have long been popular choices among grillers. However, building your own drum smoker offers a new fan favorite to the grilling game. Reinventing the wheel is often questioned, but building your own drum smoker is worth it. This article will focus on building a 55-gallon drum/barrel smoker, which offers an easy way to cook food with low and slow heat while ensuring continuous circulation of flavors and juices.
There are two main reasons why building a barrel smoker is worth considering. Firstly, vertical drum smokers are perfect for beginners as they offer an easy way to smoke food without constant monitoring. Additionally, they cook faster compared to traditional smokers as the moisture from the meat creates humidity that keeps it moist throughout the cooking process.
Building your own barrel smoker not only adds to your handyman skills but also allows you to showcase your craftsmanship to friends and family. While buying a pre-assembled drum smoker is an option, it can be quite expensive. By investing time into building your own using parts from R&R Smokers, you can save several hundred dollars while enjoying the satisfaction of creating something unique.
To ensure success in this project, proper planning is essential. Allocate around 8-10 hours for completion over two days: one day for burn-in process and paint preparation, and another day for assembly. The burn-in process involves creating a fire in the barrel to burn off the paint on the outside, while cleaning involves using an impact drill and pressure washer to remove any remaining burnt ash and soot.
Once the barrel is cleaned, it is ready for priming and painting. Using high-temperature paint specifically designed for BBQs, prime the barrel, lid, and external parts. Let them dry before applying multiple coats of paint as needed. Hanging the parts on a rack or using wire/string can make spray painting easier.
The lid is an important component that requires careful planning. Decide how you want it to open and look, considering factors like exhaust pipes and existing spout holes. Mark the hole for drilling and attach the handle using nuts and bolts provided with your kit.
Dividing the barrel into quarters, mark each section on top of the barrel. This will serve as a guide when creating straight lines down the barrel for drilling holes. Use string, a marker, plum line, and T-square to accurately mark and drill all necessary holes for air intake, handles, and axles.
As you progress through the build, you’ll notice many bolts sticking inside the barrel. It’s recommended to take note of their placement as they may interfere with certain components later on. With careful planning and attention to detail during each step of this DIY journey in fire and metal, you’ll soon have your own custom 55-gallon drum smoker that will impress both yourself and your friends.
Things you need:
– 55-gallon drum/barrel
– R&R Smokers hardware and accessories kit
– Impact drill and synthetic brush or polishing wheel
– Pressure washer
– Primer paint
– Black BBQ paint (high temperature)
– Accent color spray paint
– Brush for priming and painting
– Metal wire and string for hanging parts
Time
Building a 55-gallon barrel smoker can take a total of 8-10 hours to complete. It’s best to start the burn-in process and painting/prep one day and finish assembly the next day. The paint needs time to dry, so you’ll have downtime while waiting for it to dry.
The burn-in process, which involves burning off the paint on the outside of the barrel, should take about an hour. Afterward, you’ll need to let the barrel cool before cleaning it. Cleaning the barrel with an impact drill and synthetic brush should only take around 30 minutes.
Once cleaned, you can rinse off both the inside and outside of the barrel and let it dry in the sun. This may take a day or less depending on weather conditions. The following day, you can begin priming and painting the barrel and lid. Multiple coats may be needed, so follow the paint manufacturer’s directions for drying times between coats.
Spray painting the external parts will also require drying time between coats. It’s recommended to spray all or a portion of these parts with your accent color, but this is up to personal preference.
Drilling holes in the barrel for various components can be done at once or one component at a time. This process includes marking string lines on top of the barrel, dividing it into quarters, marking air intake holes, handle holes, axle holes, etc.
Overall, building your own drum smoker will require several hours of your time spread out over multiple days in order to properly prepare and assemble all the necessary components.
Barrel Burning Process Items
To prepare the barrel for painting and customization, you will need the following items:
1. Firewood or wood chips: These will be used to create a hot fire inside the barrel to burn off the paint.
2. Accelerant: This can be lighter fluid or any other flammable substance that helps ignite the fire.
3. Impact drill: This will be used to clean off any remaining burnt ash and soot from the barrel.
4. Synthetic brush or polishing wheel: These tools can help with the cleaning process.
5. Pressure washer: This will be used to rinse off both the inside and outside of the barrel and lid.
6. Primer: A high-temperature primer is recommended to ensure that the paint adheres properly to the surface of the barrel.
7. Black BBQ paint: This high-temperature paint will withstand the heat of your smoker and give it a clean look.
8. Accent color spray paint (optional): You can choose an accent color for certain parts of your smoker, such as handles or vents.
9. Hanging apparatus: Find something like a bike rack or metal wire/string to hang your parts on while spray painting them.
These items are essential for properly preparing the barrel for painting and customization, ensuring that it looks great and functions well as a smoker.
Painting Process Items
The painting process for building a barrel smoker involves several steps to ensure a clean and professional finish. Here are the items you will need:
- Primer: A high-quality primer will help the paint adhere to the surface of the barrel.
- Black BBQ Paint: Choose a paint specifically designed for high temperatures to withstand the heat of your smoker.
- Accent Color: Consider adding an accent color to make your smoker stand out. Choose a color that complements your overall design.
- Spray Paint: Use spray paint for easy application and even coverage. Opt for a flat finish or glossy finish, depending on your preference.
- Brush: Use a brush to apply primer and touch up any areas that may require extra attention.
- Hanging Material: Find something sturdy to hang your parts on while painting, such as a bike rack or metal wire.
1. Burn off the liner: Start by creating a fire in the barrel to burn off any remaining paint on the outside. Ensure proper ventilation for oxygen flow.
2. Clean the barrel: Use an impact drill and synthetic brush to remove any burnt ash and soot from the barrel’s interior. Rinse with a pressure washer both inside and outside the barrel and lid.
3. Let it dry: Leave the barrel in sunlight or allow it sufficient time to dry completely before proceeding with painting.
4. Apply primer: Use a brush to prime the barrel, lid, and external parts. Follow manufacturer’s instructions for drying time and multiple coats if necessary.
5. Spray paint external parts: Hang your parts on a suitable surface using wire or string, then spray them evenly with paint. Apply multiple coats if needed, ensuring to cover the underside as well.
6. Paint the barrel and lid: Starting from the top, paint the barrel and lid using a brush or spray paint. Allow each coat to dry before applying another.
7. Choose an accent color: Decide whether you want to paint some or all of the external parts with an accent color to make them stand out. Be creative and customize your smoker’s appearance.
8. Attach lid handle: Find the middle of the lid and drill holes for attaching a handle. Consider existing exhaust pipe and spout hole placements for symmetry.
9. Mark and drill holes: Use string, a marker, plum line, and T-square to mark sections on the top of the barrel for drilling evenly spaced holes. Follow a tutorial or guide for accurate placement.
10. Drill additional holes: Mark and drill air intake holes, handle holes, and axle holes as needed.
11. Secure components: Assemble your drum smoker by inserting bolts through the drilled holes and securing them with nuts provided in your kit or hardware set.
12. Touch up any areas: Once everything is assembled, check for any areas that may need touch-up painting or adjustments.
By following these steps, you will achieve a professional-looking paint finish on your DIY drum smoker while adding personal flair to its design.
Building Process Items
– Burn the liner out of the drum by creating a fire and allowing it to burn off the paint on the outside of the barrel. Make sure there is enough oxygen for the fire to breathe easily.
– Clean the barrel using an impact drill and synthetic brush to remove any remaining burnt ash and soot. Rinse off both the inside and outside of the barrel with a pressure washer.
– Let the barrel dry in the sun before applying primer and black BBQ paint. Consider using an accent color for certain parts of the smoker.
– Hang the parts on a rack or wire to spray paint them, making sure to cover all surfaces including the underside. Apply multiple coats if necessary.
– Decide how you want the lid to open and drill a handle into it, considering any existing holes or exhaust pipes that may be present.
– Divide the barrel into quarters using marks on top of the barrel. Use string, a marker, plum line, and T-square to create straight lines down the barrel for drilling holes.
– Drill all necessary holes at once or go component by component. Mark air intake holes, handle holes, and axle holes as needed.
– When assembling, make sure to secure bolts inside the barrel properly. Consider adding gaskets between components for better sealing.
Overall, building your own drum smoker requires careful preparation and attention to detail in order to achieve a high-quality result.
Things you might forget to do:
1. Burn off the liner: It’s important to burn off the paint on the outside of the barrel to remove any chemicals or residue that may be present. This can be done by creating a fire in the barrel and allowing it to burn hot enough to remove the paint.
2. Clean the barrel: After burning off the liner, it’s necessary to clean the barrel thoroughly. Use an impact drill and a synthetic brush or polishing wheel to remove any remaining burnt ash and soot. Rinse both inside and outside of the barrel with a pressure washer to leave it clean.
3. Let the barrel dry: After cleaning, let the barrel dry completely before applying primer and paint. Leaving it out in the sun can help speed up the drying process.
4. Choose suitable paint: It’s important to use high temperature paint for your smoker, as it will be able to withstand the heat generated during cooking. BBQ paint is a good option for this purpose. Additionally, consider using an accent color for certain parts of your smoker to add a unique touch.
5. Spray all sides of each part: When spray painting your parts, make sure to cover all sides evenly for a consistent finish. Be sure to spray the underside of each part as well, especially on subsequent coats, in case any over-spray or drips need covering up.
6. Plan out handle placement: Before drilling holes for handles on your lid, consider how you want it to open and what you want it to look like. Take into account other components such as exhaust pipes and existing spout holes when deciding where to place handles for symmetry.
7. Mark sections and drill holes: Divide your barrel into quarters and mark them on top for reference when drilling holes. Use a string, marker, plum line, and T-square to create straight lines down the barrel for drilling holes. Follow a tutorial or guide for specific instructions on marking and drilling.
8. Consider component placement: Take note of all the bolts that will be sticking inside the barrel and plan accordingly. Ensure that they won’t interfere with the placement of other components or hinder the functionality of your smoker.
How To Build a Drum Smoker Instructions

Building a drum smoker requires careful preparation and attention to detail. Here is a step-by-step guide on how to build your own drum smoker:
1. Burn the liner out of the drum: Start by creating a fire in the barrel and let it burn hot enough to burn off the paint on the outside of the barrel. Ensure there is enough oxygen for the fire to breathe easily. Once the barrel is charred, let it cool and pour out the ashes.
2. Clean the barrel: Use an impact drill and a synthetic brush (or a polishing wheel) to clean off any remaining burnt ash and soot from inside and outside the barrel. Rinse off both sides with a pressure washer for a clean surface.
3. Paint preparation: Choose high-temperature paint suitable for BBQs. Prime the barrel, lid, and external parts using a brush, then paint them in your desired colors. Spray paint can be used for better coverage.
4. Attach handle to lid: Find the middle of the lid and drill holes for attaching handles using nuts and bolts provided in your kit. Take into consideration other components such as exhaust pipes when planning where to position handles.
5. Marking lines on barrel: Locate the seam of the barrel as its backside and divide it into quarters by marking lines on top of the barrel using string, marker, plum line, and T-square tools.
6. Drill holes: Follow a tutorial or guide to determine where to drill holes for various components such as air intake holes, handle holes, axle holes, etc. It’s recommended to drill all holes at once or progress one component at a time based on personal preference.
7. Assemble components: Install bolts through drilled holes according to specific instructions provided in your kit or tutorial guide. Take care not to leave any sharp edges that could cause injury.
8. Final touches: Once all components are securely attached, make any necessary adjustments or fixes to ensure everything fits together properly. Test the functionality of your drum smoker before using it for cooking.
Remember to take your time during each step and follow instructions carefully to build a safe and functional drum smoker. Enjoy the process and the satisfaction of creating something unique that reflects your personal style.
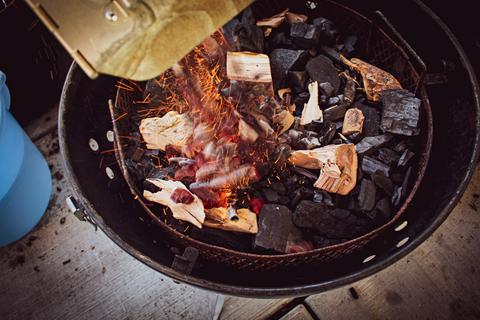
1. Burn In: Create a Fire That Counts
1. Burn In: Create a Fire That Counts
To prepare your 55-gallon barrel for the smoker conversion, the first step is to burn off the paint and residue from the inside of the drum. This can be done by making a fire in the barrel and allowing it to burn hot enough to remove the paint. It’s important to create a way for oxygen to reach the bottom of the barrel to ensure proper airflow for the fire. Once the fire is burning well, you can add wood and accelerant as needed.
During this process, it’s also a good idea to burn off any paint on the lid of the barrel. This can be done while waiting for the fire in the drum to grow. The entire burn-in process should take about an hour.
After burning off the paint, allow the barrel to cool before handling it. Once cooled, you can simply pour out any ashes that remain in the drum.
2. Clean and Prep: Get Ready for Painting
After burning off the paint, it’s time to clean and prep your drum smoker for painting. Use an impact drill and a synthetic brush or polishing wheel to remove any remaining burnt ash and soot from both inside and outside of the barrel and lid. This will make working with the drum much cleaner and easier.
Next, use a pressure washer to rinse off both inside and outside surfaces of the barrel and lid. This will leave you with a clean-looking surface ready for painting.
3. Paint Preparation: Choosing Colors
Once cleaned, it’s time to choose your paint colors for your drum smoker. It’s recommended to use high-temperature BBQ paint that can withstand heat from your smoker.
Start by applying primer with a brush on both inside and outside surfaces of the barrel and lid. Once primed, paint them with your chosen colors using top-to-bottom strokes. Follow manufacturer’s directions for drying times between coats.
For external parts like handles or other accessories, you can choose to paint them all in your accent color or use the original black paint for contrast. Spray paint these parts, making sure to cover all sides and angles.
4. Assembly: Adding Handles and Drilling Holes
Once the paint is dry, it’s time to assemble your drum smoker. Start by drilling holes for handles and other components using the marks you made earlier on the barrel. Follow a tutorial or guide for specific instructions on hole placement and drilling techniques.
Be mindful of any bolts sticking inside the barrel from attaching handles or other parts. Consider using protectors or caps to prevent any sharp edges from causing injuries.
By following these steps, you can properly prepare your 55-gallon barrel for converting it into a customized drum smoker that will enhance your grilling experience and impress your friends with your DIY skills.
2. Paint Preparation: Why It Matters…or Sort of Matters
Paint preparation is an important step when building a 55-gallon barrel smoker. While it may not seem crucial, it can greatly affect the final outcome of your DIY project. By properly preparing and painting your barrel, you can ensure that it looks amazing and lasts for a long time.
One reason why paint preparation matters is because it helps to clean and remove any residue or impurities from the barrel. After burning out the liner and cleaning the barrel, using an impact drill and synthetic brush to further clean off burnt ash and soot can make a significant difference in the appearance of the barrel. Additionally, rinsing off both the inside and outside of the barrel with a pressure washer leaves you with a clean surface to work with.
Another reason why paint preparation matters is for aesthetic purposes. Painting the barrel not only gives it a polished look but also helps protect it from rust and corrosion. Using high-temperature paint specifically designed for BBQs ensures that the paint will withstand the heat generated by the smoker. You can choose your desired color for both the barrel and its external parts, allowing you to customize your drum smoker to fit your personal style.
Taking the time to properly prime and paint your barrel and its components will result in a quality finish that enhances both the appearance and durability of your drum smoker. It may seem like an extra step in the process, but it is definitely worth it in order to achieve a professional-looking end product.
3. Painting – General and Barrel
Building a 55-gallon barrel smoker involves several steps, including paint preparation. The process of painting the barrel is important for both aesthetic and practical reasons. After burning and cleaning the barrel, it is left with a rusty appearance, which may not be desirable depending on where the smoker will be placed. Additionally, using high-temperature paint specifically designed for BBQs ensures that the paint can withstand the heat generated by the smoker.
To begin the painting process, it is recommended to apply primer to the barrel, lid, and external parts using a brush. This helps create a smooth surface for the paint to adhere to. Once primed, black BBQ paint can be applied to the barrel and lid. It is best to start painting from top to bottom so that the underside of the barrel can be painted once the top dries. Multiple coats may be needed, following the directions provided by the paint manufacturer.
For additional customization and flair, certain external parts can be spray painted with an accent color of choice. It is important to ensure that all parts are thoroughly sprayed, including their undersides. Hanging these parts while spraying them allows for even coverage and prevents drips. Depending on personal preference, all external parts can be painted with the accent color or a combination of accent color and black.
When it comes to drilling holes in the barrel for various components like handles and air intakes, it is recommended to mark these positions beforehand based on quarter divisions of the barrel. This allows for precise placement of each component. Following tutorials provided by R&R Smokers can help guide this process effectively.
Overall, taking time to properly prepare and paint the barrel enhances its appearance and durability while also allowing for personal customization and creativity in building a DIY drum smoker.
4. Painting – External Parts
Building a 55-gallon barrel smoker involves several steps, including paint preparation. The paint preparation process is important because it not only improves the appearance of the smoker but also protects it from rust and other damage. In this article, the author recommends burning out the liner of the drum by creating a fire inside it and allowing it to burn off the paint on the outside. This process should take about an hour. Once the barrel is charred, it can be cleaned using an impact drill and a synthetic brush or a polishing wheel. The barrel should then be rinsed with a pressure washer both inside and outside. Afterward, the barrel should be left to dry before applying primer and paint.
The author suggests using black BBQ paint for the barrel as it can withstand high temperatures. For accent colors, they recommend choosing one that hides imperfections and looks appealing. The parts can be hung using a bike rack or any suitable object to spray paint them. It is important to spray all sides of each part, especially on the second coat if there are any drips or imperfections from the first coat. The lid should also be painted according to personal preference, keeping in mind that there will be an exhaust pipe and an original spout hole in it.
To create straight lines down the barrel for drilling holes, divide it into quarters starting from the seam at the back of the grill. Mark each section on top of the barrel and use string, a marker, plum line, and T-square to ensure accurate measurements. Following a tutorial from R&R Smokers can provide guidance on where to mark holes for various components such as air intake holes, handle holes, and axle holes. Finally, make sure to securely fasten bolts inside the barrel after drilling all necessary holes.
Overall, proper paint preparation is crucial in building a 55-gallon barrel smoker as it enhances its appearance and durability while allowing for customization options.
5. Drilling – The Nuts and Bolts of it All
5. Drilling – The Nuts and Bolts of it All
To assemble your drum smoker, drilling is a crucial step. You will need to drill holes for various components such as the air intake holes, handle holes, and axle holes. It’s recommended to mark these holes beforehand to ensure accuracy and consistency in your measurements.
Before drilling, it’s important to have all the necessary tools on hand. This includes a drill, appropriate drill bits for metal, a marker, string, plum line, and a T-square. Following the tutorial from R&R Smokers can provide helpful guidance on where to place your marks and how to create straight lines down the barrel.
Once you have marked all the necessary holes, it’s time to start drilling. It may be more efficient to drill all the holes at once rather than one component at a time. This will depend on your personal preference and work style.
After drilling the holes, you will notice several bolts sticking inside the barrel. It is recommended to use lock nuts or washers to secure these bolts in place and prevent them from coming loose during use.
By following these steps and taking your time with the drilling process, you will ensure that your drum smoker is assembled securely and ready for use. Remember to refer back to the R&R Smokers tutorial for additional guidance throughout this process.
6. Drilling Holes – Plan First, Drill After
6. Drilling Holes – Plan First, Drill After
When it comes to drilling holes in your barrel smoker, careful planning is essential before you begin the drilling process. Start by finding the seam of the barrel, which will serve as the back of your grill. From there, divide the barrel into quarters and mark each section on the top of the barrel.
To create straight lines down the barrel, gather some string, a marker, a plum line, and a T-square. Following a helpful tutorial from R&R Smokers, learn how to mark your string in order to streamline your drilling process.
Once you have all your holes marked, it’s time to start drilling. You can choose to drill all the holes at once or go component by component if that suits your progress-based approach better.
Keep in mind that there will be several bolts sticking inside the barrel after drilling. It is advisable to secure these bolts with nuts and washers to ensure they don’t interfere with any other parts or components of your drum smoker. By taking the time to plan out your hole placement and carefully execute the drilling process, you can ensure a successful build for your DIY drum smoker.
7. Internal Drum Assembly – The Guts of It
7. Internal Drum Assembly – The Guts of It
Once you have finished painting and prepping the exterior of the drum smoker, it’s time to focus on the internal assembly. This is where you will be installing all the necessary components that make the drum smoker functional.
First, you will need to install the charcoal basket. This is what holds the charcoal or wood chips for smoking. Place the basket at the bottom of the drum, ensuring it sits securely. You can use bolts and nuts to attach it to the drum if necessary.
Next, you will need to install the cooking grates. These are where your food will sit while it cooks. Depending on your preference, you can install multiple grates at different heights to accommodate different types of food or cooking styles.
After that, it’s time to install the heat deflector plates. These plates help distribute and regulate heat within the drum smoker. They prevent direct flames from reaching your food, resulting in more even and controlled cooking.
You will also need to install a water pan. This pan helps create moisture within the smoker, keeping your food moist during cooking. It can be placed above or below the heat deflector plates, depending on your preference.
Lastly, don’t forget to install a thermometer on the lid of your drum smoker. This will allow you to monitor and control the temperature inside the smoker while cooking.
Overall, assembling these internal components is relatively straightforward and can be customized based on your preferences and cooking needs. Just make sure everything is securely attached and in its proper place before firing up your newly built drum smoker for its first cookout!
8. Air Intake Drilling – Advice to Consider
8. Air Intake Drilling – Advice to Consider
When drilling the air intake holes on your drum smoker, there are a few things you should consider. First, determine how many air intakes you want and where you want them placed on the barrel. The number and placement of the air intakes will affect the airflow and temperature control of your smoker.
It is recommended to have at least three evenly spaced air intake holes for proper ventilation. These holes should be drilled near the bottom of the barrel to allow for efficient airflow. A common size for air intake holes is 1 inch in diameter, but this can vary depending on personal preference.
When drilling the holes, make sure to use a drill bit that is suitable for metal. Start with a smaller pilot hole and gradually increase the size until you reach your desired diameter. It’s important to drill the holes cleanly and without any burrs or rough edges that could hinder airflow.
To prevent rusting, it is recommended to paint or coat the inside of the drilled holes with high-temperature paint or a food-safe sealant. This will help protect the metal from moisture and extend the lifespan of your drum smoker.
Lastly, consider adding adjustable dampers or vents to your air intake holes. These can help regulate airflow and temperature more precisely, giving you better control over your smoking process.
By carefully planning and drilling your air intake holes, you can ensure optimal airflow and temperature control in your drum smoker, resulting in deliciously smoked meats every time.
9. Hinge and Wheel Installation
9. Hinge and Wheel Installation
To begin the hinge installation, you will need to attach the hinges to the lid of the barrel smoker. Position the lid in the desired open position and mark where the hinges should be placed. Then, use screws or bolts to secure the hinges to the lid.
Next, you will need to install wheels on one side of the barrel smoker. This will allow for easy mobility and transportation of your smoker. Choose a sturdy and durable set of wheels that can support the weight of the barrel.
Position the wheels on one side of the barrel, near the bottom. Mark where the holes for attaching the wheels should be drilled. Use a drill bit that matches the size of your wheel’s mounting hardware and carefully drill through the barrel.
Once all holes are drilled, attach your wheels using nuts and bolts or screws provided with your wheel assembly kit. Make sure they are securely fastened so that they can withstand movement and transportation.
By installing hinges and wheels on your drum smoker, you are adding convenience and functionality to your DIY project. The hinges allow for easy access to your food while cooking, while the wheels make it effortless to move your smoker around as needed.
Overall, this step adds finishing touches to your drum smoker build and enhances its usability for years to come.
Cost/Benefit Analysis
Building your own drum smoker can be a rewarding DIY project that offers customization and personal flair to your cooking experience. While you can purchase a finished drum smoker from leading brands, building your own allows you to create a unique cooker that will last for years.
A drum smoker, also known as a barrel smoker, offers a simple cooking method using low and slow heat to cook delicious meals. It is a popular choice among both beginners and experienced grillers due to its ease of use and ability to infuse flavors into the food. Additionally, drum smokers often cook faster than traditional smokers, thanks to the moisture from the meat creating humidity that keeps the meat moist while cooking.
One of the main benefits of building your own barrel smoker is the sense of accomplishment and pride in creating something with your own hands. It’s akin to building furniture or fixing up a car; it’s an opportunity to showcase your handyman skills and impress your friends. Plus, building your own smoker can save you several hundred dollars compared to buying one from a manufacturer.
To successfully build your drum smoker, proper preparation is key. This includes burning off the paint on the outside of the barrel by creating a fire inside it and letting it burn hot enough. Once charred, let the barrel cool before cleaning off any remaining ash and soot using an impact drill and pressure washer. Afterward, allow the barrel to dry before applying primer and high-temperature BBQ paint.
When painting your drum smoker, consider adding an accent color for visual appeal. Some builders prefer a glossy finish for their smokers, while others opt for a flat finish. The choice is yours depending on personal preference.
In terms of cost-benefit analysis, building your own drum smoker can save you several hundred dollars compared to purchasing one from a manufacturer. While it requires time and effort on your part, this DIY project offers customization options and allows you to showcase your handyman skills. The satisfaction of creating something unique and functional, combined with the cost savings, makes building a drum smoker a worthwhile endeavor for BBQ enthusiasts.
Cost
Building your own drum smoker can save you several hundred dollars compared to buying a pre-made one. While a premium welded drum smoker from Gateway Drum Smokers can start at $1,199 USD, you can build your own Ugly Drum Smoker using parts from R&R Smokers for $300-400 USD. However, keep in mind that you will also need to purchase a 7-gallon charcoal basket, find your own barrel, and buy paint for the project. Despite the cost savings, the sense of accomplishment and the ability to customize your smoker make it worth the investment for DIY enthusiasts.
Benefit
Building your own drum smoker provides several benefits. Firstly, it allows for customization and personalization of your smoker, giving you the opportunity to add your personal flair to the cooker. Additionally, building your own drum smoker can be a rewarding DIY project that adds to your repertoire of handyman skills. It also saves you money compared to buying a pre-made drum smoker from a manufacturer. Finally, a drum smoker offers an easy way to cook food without constant monitoring, making it a great choice for both beginners and experienced grillers alike.
How Does Drum Smoker Food Taste?
How Does Drum Smoker Food Taste?
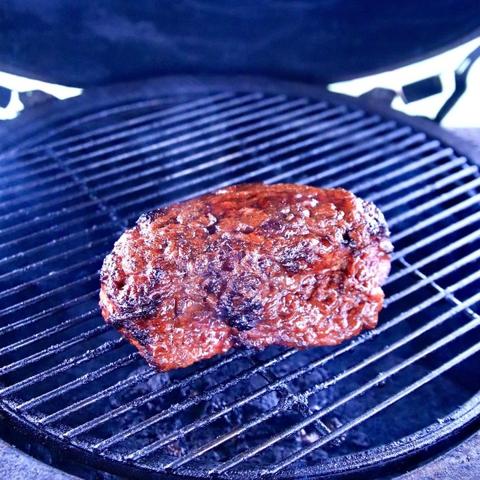
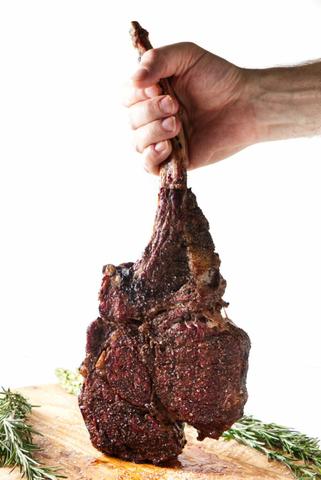
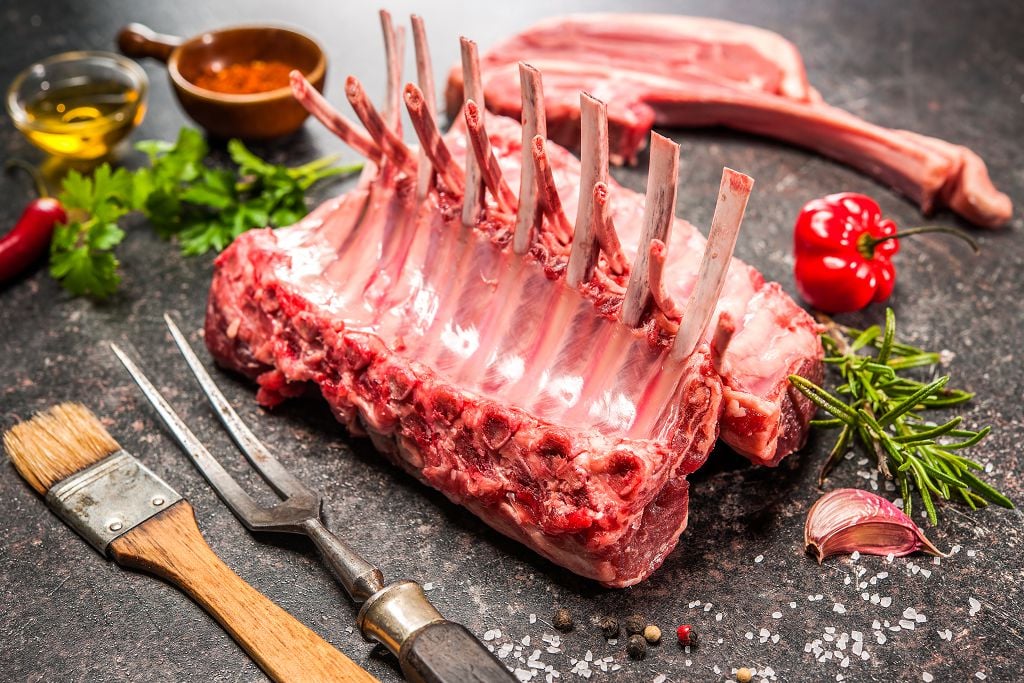
Drum smoker food has a unique and delicious taste that is unlike anything you can achieve with a traditional gas grill. The low and slow cooking method of a drum smoker allows the flavors to develop slowly and infuse into the meat, resulting in tender, juicy, and flavorful dishes.
One of the advantages of a drum smoker is its ability to retain moisture. As the meat cooks, the moisture from the meat drips onto the heat deflectors, creating a humid environment that helps to keep the meat moist throughout the cooking process. This results in incredibly succulent and flavorful food that will leave you wondering why you didn’t switch to a drum smoker sooner.
In addition, the design of a drum smoker allows for even heat distribution, ensuring that your food is cooked evenly from all sides. This means no more worrying about hot spots or unevenly cooked meat. Whether you’re smoking ribs, brisket, or chicken, you can expect perfectly cooked and delicious results every time.
The smoky flavor is also a standout feature of drum smoker food. The combination of charcoal and wood creates an intense smoky aroma and taste that adds depth and complexity to your dishes. From rich mesquite to sweet applewood, you can experiment with different types of wood chips or chunks to achieve your desired flavor profile.
Overall, drum smoker food offers a mouthwatering experience that will satisfy even the most discerning BBQ enthusiasts. Once you taste the difference it makes in your cooking, you’ll understand why building your own drum smoker is well worth the effort.
Overall Experience
Building a 55-gallon barrel smoker was a challenging but fulfilling DIY project. It allowed me to customize my smoker and showcase my handyman skills. The process of burning out the liner, cleaning the barrel, and painting it was time-consuming but necessary for a clean and polished final product.
The paint preparation stage was particularly satisfying as it transformed the rusty-looking barrel into a sleek and professional-looking smoker. I used high-temperature black BBQ paint for the barrel and lid, while adding an accent color for the remaining parts. Following the paint manufacturer’s directions and applying multiple coats ensured a quality finish.
Hanging the parts for spray painting required some creativity, but using my kids’ bike rack worked well. The key was to spray both sides of each part, allowing for touch-ups on any drips or imperfections during the second coat. The lid assembly required careful planning to ensure proper functionality with the exhaust pipe and spout hole.
Dividing the barrel into quarters and marking the holes for various components made drilling much easier. Following R&R Smokers’ tutorial provided valuable guidance on placement and technique. It is important to note that there are many bolts sticking inside the barrel, which can be cumbersome during assembly but ultimately contribute to a sturdy structure.
Overall, building my own drum smoker was a rewarding experience that saved me money compared to buying a pre-made one. It also gave me a sense of pride in creating something unique and functional. Whether you’re new to smoking or an experienced griller looking for customization options, building your own barrel smoker is definitely worth considering.
Conclusion
Building your own drum smoker can be a rewarding DIY project for BBQ enthusiasts. Not only does it allow for customization and personal flair, but it also saves you money compared to buying a pre-made smoker. Drum smokers, also known as barrel smokers, offer an easy and efficient way to cook food with low and slow heat. They are especially great for beginners, as they require less monitoring and offer faster cooking times than traditional smokers.
To start building your drum smoker, you will need to prepare the barrel by burning off the paint and cleaning it thoroughly. This can be done by making a fire in the barrel and letting it burn hot enough to remove the paint. Once cooled, you can clean off any remaining burnt ash and soot using an impact drill or a pressure washer.
After cleaning, you can proceed with the painting process. It is recommended to use high-temperature BBQ paint for the barrel and lid, as they will be exposed to heat during cooking. You can choose an accent color for other external parts if desired. Multiple coats may be needed, so follow the paint manufacturer’s instructions for best results.
Once painted, you can assemble the various components of your drum smoker according to your desired design. This may include drilling holes for air intake and handle placement. Following a tutorial from R&R Smokers can provide helpful guidance on marking and drilling these holes.
Overall, building your own drum smoker allows for creativity, cost savings, and a sense of accomplishment. Whether you’re new to smoking or a seasoned griller looking for a new project, building a drum smoker is definitely worth considering. So grab your tools and get ready to enjoy delicious smoked meats with your custom-made smoker!
In conclusion, making an ugly drum smoker is a cost-effective and straightforward way to enhance your outdoor cooking experience. By following the step-by-step guide and utilizing common tools and materials, anyone can transform an old drum into a functional and efficient smoker. Whether you’re a beginner or experienced griller, this DIY project offers endless possibilities for delicious smoked meats and unique flavor profiles. So, unleash your creativity, embrace the imperfections, and enjoy the mouthwatering results of your very own homemade ugly drum smoker.
Learn More About Grilling
If you want to learn more about grilling, check out these other helpful resources!