“Indulge in a delightful treat with our homemade blueberry ice cream recipe. Discover the perfect balance of creamy sweetness and tangy blueberries, resulting in a refreshing summer dessert that will leave you craving for more.”
Homemade Blueberry Ice Cream
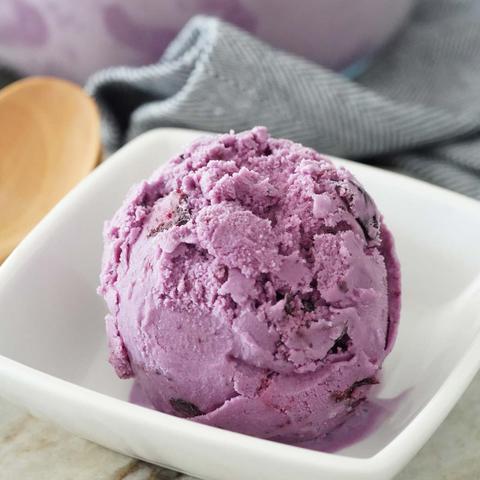
This homemade blueberry ice cream is made with fresh blueberries, sugar, and half and half to create a creamy and delicious scoopable treat. The recipe is incredibly flavorful, with the freshest blueberries giving it a deep color and rich taste. Many people have claimed that this blueberry ice cream is their favorite among the various ice cream recipes they’ve tried.
One of the best aspects of this blueberry ice cream recipe is its simplicity. Unlike other recipes that use a custard base, this one requires no eggs to temper. All you need to do is reduce the blueberries, cool the mixture, add it to the half and half, and churn it in an ice cream maker. The result is a smooth and creamy ice cream without any custard base or egg yolks.
To make this homemade blueberry ice cream, combine fresh blueberries, sugar, and water in a saucepan over medium heat. Bring the mixture to a boil and then simmer for about 10 minutes until it thickens. Strain the mixture through a fine-mesh strainer into a bowl, reserving the pulp if desired for added texture and flavor.
Once cooled, stir in half and half and refrigerate for at least 3 hours or overnight to ensure that the mixture is very cold. When ready to churn the ice cream, pour the mixture into an ice cream maker barrel and churn according to the manufacturer’s instructions. Add in the reserved blueberry pulp during churning for extra flavor.
Transfer the churned ice cream into a freezer-safe container and freeze for about 2 hours until firm. Serve your homemade blueberry ice cream as a refreshing summer treat or use it as an opportunity to experiment with different fruits like peaches, strawberries, or mangoes.
Ingredients You Need
This homemade blueberry ice cream recipe requires the following ingredients:
- 2 cups half-and-half or 1 cup whole milk/1 cup cream
- 2 cups fresh blueberries (or frozen blueberries)
- 1 cup granulated sugar
- ¼ cup water
Don’t Forget the Ice Cream Scoop!
A good ice cream scoop is essential for serving up homemade ice cream. The author recommends a heavy-duty stainless steel scoop that is easy to grip and makes scooping a breeze. With the right scoop, you can easily create perfect scoops of creamy blueberry ice cream.
This blueberry ice cream recipe can be easily customized by using different types of fresh, ripe fruit. Whether it’s peaches, strawberries, or mangoes, any fruit that is very ripe will work in this recipe. Feel free to get creative and try out different flavor combinations to find your favorite.
If you don’t have an ice cream maker, you can still make this blueberry ice cream by freezing the mixture until firm and then using an ice cream scoop to serve. While it may not be as airy as churned ice cream, it will still be delicious and satisfying.
How to Make Blueberry Ice Cream

To make blueberry ice cream, start by combining fresh blueberries, sugar, and water in a saucepan over medium heat. Bring the mixture to a boil and then reduce the heat to low and simmer for about 10 minutes. Next, press the mixture through a fine-mesh strainer into a bowl, reserving the pulp if desired. Let the blueberry syrup cool completely.
Once cooled, stir in half and half (or a combination of whole milk and cream). Cover and refrigerate the mixture for at least 3 hours or overnight to ensure it is very cold.
When you’re ready to churn the ice cream, set up your ice cream maker according to manufacturer’s instructions. Slowly pour the mixture into the barrel and churn for about 15 minutes or until it reaches a soft-serve consistency. If desired, add in the reserved blueberry pulp during this stage and churn for a few more minutes to incorporate.
Turn off the machine and transfer the ice cream to a freezer-safe container. Freeze for at least 2 hours, or until firm. Enjoy your homemade blueberry ice cream!
Step One: Reduce the Blueberries
Step One: Reduce the Blueberries
In a saucepan over medium heat, combine the blueberries, sugar, and water. Bring the mixture to a boil, then reduce the heat to low and let it simmer uncovered for about 10 minutes. Keep an eye on it to prevent scorching on the bottom.
After simmering, press the mixture through a fine-mesh strainer into a bowl. This will separate the pulp from the syrup. You can reserve the pulp to add back into the ice cream later for texture and extra flavor if desired. Set aside the blueberry syrup to cool completely.
Once cooled, stir in half and half (or a combination of whole milk and cream). Cover the mixture and refrigerate it for at least 3 hours or overnight to ensure that it is very cold before churning.
Note: If you don’t have an ice cream maker, you can still make this recipe by freezing the base mixture for 24 hours. Just be sure to add in any desired additions like blueberry pulp before freezing.
Step Two: Mix the Ice Cream Base
Step Two: Mix the Ice Cream Base
To make the ice cream base, you will first need to combine the blueberries, sugar, and water in a saucepan over medium heat. Bring the mixture to a boil and then reduce the heat to low and let it simmer for about 10 minutes. This will help soften and sweeten the blueberries.
Next, strain the mixture through a fine-mesh strainer into a bowl. This step removes any solids or seeds from the blueberry mixture, resulting in a smoother ice cream texture. You can choose to reserve the pulp and add it back into the ice cream during the churning stage for added texture and flavor.
Once the blueberry syrup has cooled completely, stir in half and half. Cover the mixture and refrigerate it for at least 3 hours or overnight to ensure that it is chilled thoroughly. The colder the mixture, the faster it will freeze when churned.
When you are ready to churn the ice cream, set up your ice cream maker according to its instructions. Slowly pour the chilled blueberry mixture into the barrel of your ice cream maker. Churn according to manufacturer’s instructions, usually for about 15 minutes or until it reaches a soft-serve consistency.
At this point, you can choose to add in the reserved blueberry pulp if desired. Churn for a few more minutes to incorporate it evenly throughout the ice cream base.
Once you are satisfied with the consistency of your ice cream, turn off your machine and transfer the ice cream into a freezer-safe container. Freeze it for at least 2 hours, or until firm enough to scoop.
By following these steps, you will have a delicious homemade blueberry ice cream that is creamy, flavorful, and perfect for enjoying on hot summer days!
Step Three: Churn
Step Three: Churn
Once the ice cream mixture is cold and ready, it’s time to churn it to achieve that creamy texture. Set up your ice cream maker and turn it on. Slowly pour the chilled mixture into the barrel of the ice cream maker. Follow the manufacturer’s instructions for churning, which usually takes about 15 minutes.
As the mixture churns, it will start to thicken and reach a soft-serve consistency. At this point, you can add in the reserved blueberry pulp if desired. Churn for a few more minutes to incorporate the pulp into the ice cream.
After churning, turn off the machine and transfer the ice cream to a freezer-safe container. Cover it and place it in the freezer for at least 2 hours, or until it becomes firm.
By following these steps, you’ll be able to make delicious homemade blueberry ice cream with a creamy texture and bursting with flavor.
Milk vs Cream
Milk and cream are both commonly used in ice cream recipes, but they can have different effects on the final product. The choice between using milk or cream will depend on the desired creaminess and scoopability of the ice cream.
Using milk in an ice cream recipe, especially lower fat milks like 2% or skim milk, may result in a less creamy texture. These milks do not have enough fat content to create the same smooth and rich consistency as cream. The ice cream may end up being icy and harder to scoop.
On the other hand, using cream, especially heavy cream, will result in a much creamier and thicker ice cream. Cream has a higher fat content than milk, which contributes to its luxurious texture. If you prefer a richer and more indulgent ice cream, using cream is a great option.
However, if you want to strike a balance between richness and lower fat content, using half and half is a good compromise. Half and half is a combination of equal parts whole milk and light cream. It still provides some of the creamy texture from the light cream while keeping the fat content slightly lower than using heavy cream alone.
In summary, you can use milk or cream interchangeably in an ice cream recipe, but it will affect the final product’s texture and richness. Experiment with different combinations of milk and cream to find your preferred balance of taste and consistency.
Expert Tips
1. For a more concentrated blueberry flavor, you can use orange juice concentrate instead of orange juice in this recipe.
2. If you don’t like the texture of blueberry pulp in your ice cream, you can leave it out and still enjoy a smooth and creamy blueberry ice cream.
3. Experiment with different fruits like peaches, strawberries, or mangoes to create your own unique flavor combinations.
4. If you don’t have an ice cream maker, you can still make this recipe by freezing the mixture for 24 hours and then scooping it with an ice cream scoop.
5. When using milk or cream in an ice cream recipe, keep in mind that the fat content will affect the creaminess and scoopability of the final product. Whole milk or half and half are recommended for a creamy ice cream.
6. Use fresh ripe fruit for the best flavor in your homemade ice cream. Frozen fruit can also be used if fresh is not available.
7. Invest in a good quality ice cream maker like the Cuisinart 1.5 quart ice cream maker for optimal results.
8. Follow the manufacturer’s instructions for churning time to achieve the desired soft-serve consistency before adding any additional ingredients.
9. Refrigerate the mixture for at least 3 hours or overnight to ensure it is very cold before churning.
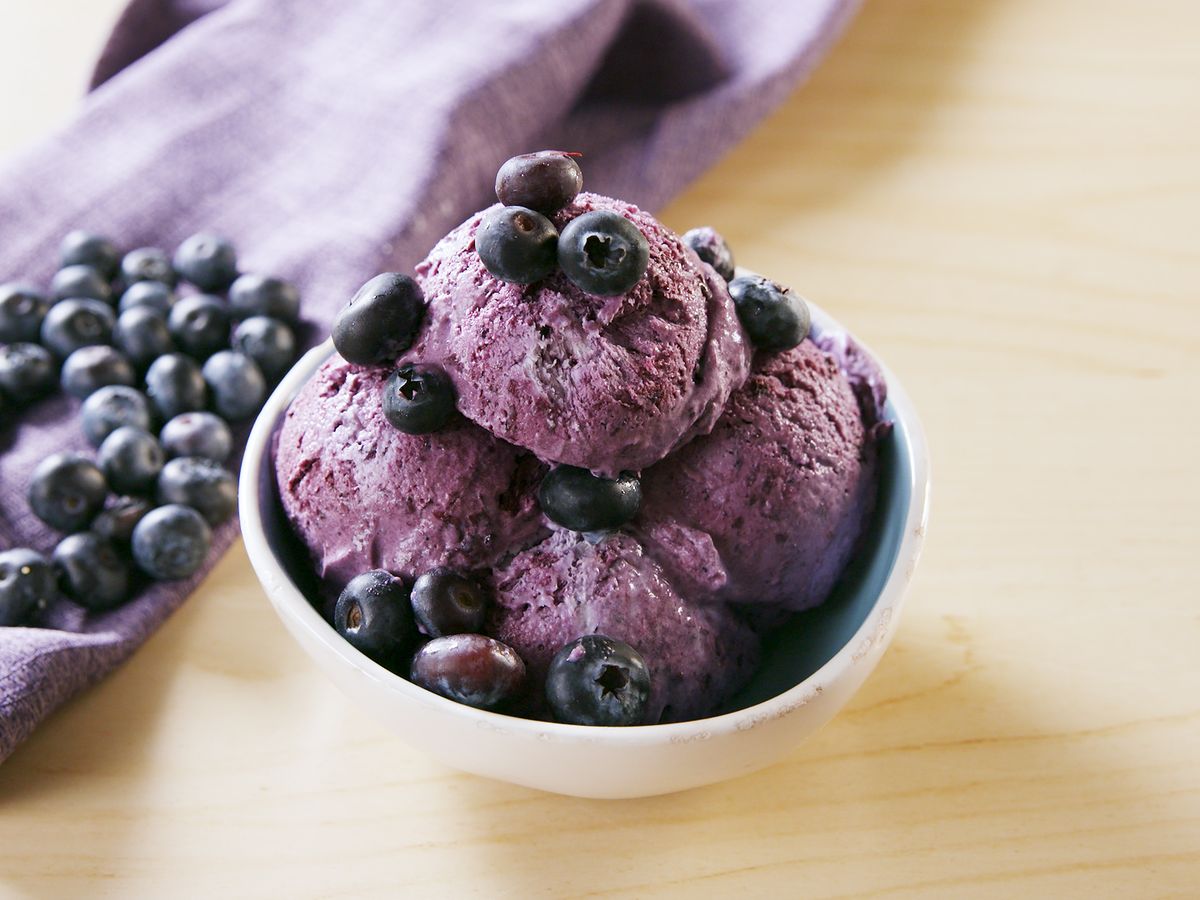
10. Enjoy your homemade blueberry ice cream as a refreshing summer treat or a delicious way to use up fresh blueberries from your garden or local market!
Frequently Asked Questions
1. Does this ice cream have to be made in an ice cream maker?
No, you can still make this recipe without an ice cream maker. Once the mixture is made, freeze it until it’s firm and then scoop it with an ice cream scoop. It won’t be as airy as when churned in an ice cream maker, but it will still taste good.
2. Can I add flavoring to the ice cream besides blueberry?
Yes, you can use any fresh, ripe fruit of your choice in this recipe. Some options include peaches, strawberries, or mango.
3. Can I use frozen blueberries instead of fresh?
Yes, frozen blueberries can be used if that’s what you have on hand.
4. Can I use milk or cream interchangeably in this recipe?
Yes, you can use different combinations of milk and cream depending on your preference. Half and half is recommended for a creamy and lower-fat ice cream.
5. Is there a custard base in this recipe?
No, this particular recipe does not use a custard base and does not contain eggs.
Does this ice cream have to be made in an ice cream maker?
No, it is not necessary to use an ice cream maker to make this blueberry ice cream. While using an ice cream maker will result in a smoother and creamier texture, you can still make the ice cream without one. Simply freeze the base mixture for 24 hours and then scoop it with an ice cream scoop. The texture may be slightly different, but it will still be delicious.
Yes, you can definitely experiment with adding other flavors to this blueberry ice cream recipe. While the recipe specifically calls for blueberries, you can substitute them with any other fresh ripe fruit that you prefer, such as peaches, strawberries, or mango. The process of making the base mixture remains the same, but you can customize the flavor profile by using different fruits.
Can I add flavoring to the ice cream besides blueberry?
Yes, you can definitely add flavoring to the ice cream besides blueberry. While this recipe specifically focuses on blueberry flavor, you can experiment with adding other flavors to customize your ice cream. Some popular options include vanilla extract, chocolate chips, crushed cookies, caramel sauce, or even a swirl of strawberry or raspberry sauce. The possibilities are endless and it’s a great way to get creative and try new combinations. Just be mindful of the ratio and adjust the amount of added flavoring according to your taste preferences.
Can I use frozen blueberries?
Yes, you can use frozen blueberries in this recipe. If you don’t have fresh blueberries on hand, frozen blueberries will work just as well. Simply thaw them before using and proceed with the recipe as directed. The ice cream will still have a delicious blueberry flavor and a vibrant color. Using frozen blueberries can be a convenient option, especially when fresh blueberries are not in season. Enjoy experimenting with different fruits to create your own unique flavors!
In conclusion, making homemade blueberry ice cream is a simple and delightful treat that can be enjoyed by all. With just a few ingredients and some basic kitchen tools, you can create a creamy and refreshing dessert that bursts with the natural sweetness of blueberries. So why not give it a try and indulge in this delicious summer delight!
Learn More About Grilling
If you want to learn more about grilling, check out these other helpful resources!