“Master the Art of Smoking a Brisket: Unlock the Secrets to Mouthwatering, Tender Perfection!”
What is a brisket?
A brisket is the breast or lower chest of the beef. Originally, it was used to make ground burger at butcher shops, but it gained popularity as a smoked cut of meat. It contains a lot of connective tissue, such as ligaments, tendons, and muscle fibers, which are not typically appetizing. This is why brisket needs to be cooked low and slow to taste great.
When buying brisket, it’s recommended to invest in a prime (AAA) grade packer brisket. Although it may be more expensive, you are investing a lot of time and effort into making a great meal. A premium cut will have the right amount of fat marbling throughout and at least 1/4″-1/2″ of consistent fat on the fat cap. This ensures that your brisket will turn out flavorful and tender.
Trimming and preparing a brisket is an important step in making a proper brisket. Start by removing most of the hard and thick part of fat on the underside of the brisket. Shape the brisket by cutting off the end of the flat until there is at least 3/4″ of meat showing. Trim down the fat cap to about 1/4″ thickness all around. The goal is to remove excess fat while ensuring even cooking and preventing dryness or burning.
For Texas-style brisket, use a simple rub made with 50% coarse black pepper and 50% coarse Kosher salt. Evenly spread this rub over the trimmed brisket without overdoing it. Let the seasoned brisket sit on the counter for up to an hour before cooking to allow the flavors to penetrate.
Injecting a marinade is a popular step in smoking brisket, but it is not necessary. Some Pitmasters prefer the taste of the beef and smoke on its own. Injecting a marinade can add flavor but may also affect the texture and moisture of the meat. It’s ultimately a personal preference.
Start by preheating your smoker to 250 degrees F. Oak wood is commonly used for smoking brisket, as it provides a medium smoky flavor that pairs well with beef. However, different woods can be used depending on personal preference. Experiment with different woods to find your preferred flavor profile.
“The Stall” refers to a stage during the cooking process where the internal temperature of the brisket plateaus or remains constant for an extended period, typically around 160-165F. This happens because the fat is rendering down and creating a cooling effect on the meat. It can last for hours, causing some BBQ enthusiasts to panic. However, this is normal and part of the cooking process.
The Texas Crutch is a technique used to speed up the cooking process of a brisket, particularly during “The Stall.” It involves wrapping the brisket tightly in foil or butcher paper to retain moisture and increase heat transfer. This method helps keep the brisket juicy and moist while reducing overall cooking time.
To determine if your brisket is done, use a meat thermometer inserted into the thickest part of the meat (not touching fat). The target internal temperature for a perfectly cooked brisket is around 200-205F. However, doneness can also be judged by the tenderness of the meat. When the brisket probes like butter and has a nice bark, it is likely ready to be removed from the smoker.
Once your brisket is done, remove it from the smoker and let it rest for at least 30 minutes to allow the juices to redistribute. Slice the brisket against the grain into thin slices for maximum tenderness. Serve with your favorite BBQ sauce or as-is for a delicious Texas-style smoked brisket experience.
Brisket usually comes in large sizes, so there may be leftovers. Leftover brisket can be used to make sandwiches, tacos, or even added to other dishes like chili or stews. It’s a versatile protein that can be enjoyed in various ways even after the initial meal.
Brisket Selection and Preparation

Learning how to smoke a brisket can be daunting, but with time and research, you can achieve the perfect result. It’s important to invest in a good cut of brisket, such as a prime (AAA) grade packer brisket, which has the right amount of fat marbling throughout. When selecting a brisket, do the “flop test” to ensure it has the right amount of fat. Trim the brisket, removing any excess fat and shaping it for even cooking.
Properly trimming and preparing the brisket is crucial. Use a narrow curved boning knife to remove thick parts of fat on the underside of the brisket. Shape the brisket by cutting off the end of the flat and rounding out sharp points or angles. Trim down the fat cap to about 1/4″ thickness all around. Once trimmed, apply a Texas-style rub consisting of 50% coarse black pepper and 50% coarse Kosher salt.
While injecting marinade is popular among Pitmasters, it’s not necessary for great-tasting brisket. Get your smoker started and brought to a temperature of 250 degrees F. Insert a meat thermometer into the thickest part of the brisket, ensuring it’s in the meat rather than the fat. Place the brisket in the smoker with the fat cap facing up and cook at a consistent temperature while providing quality thin blue smoke.
After several hours of smoking, you may experience “The Stall” where your brisket’s internal temperature plateaus. This is normal and indicates that the fat is rendering down. To speed up the cooking process and keep the brisket juicy, implement the Texas Crutch. Wrap the brisket tightly in foil and continue cooking until it reaches the desired internal temperature.
How to pick a good brisket
When choosing a brisket, it’s important to look for certain qualities. First, make sure the brisket “flops” on the ends when you pick it up in the middle. This indicates that it has the right amount of fat marbling throughout. Additionally, look for a brisket with at least 1/4″-1/2″ of consistent fat on the fat cap. This will help keep the meat moist and flavorful during the smoking process.
Trimming and preparing a brisket is a crucial step in achieving a proper result. It takes time to master this skill, but with practice, you’ll become more proficient. Start by removing most of the hard and thick part of fat on the underside of the brisket, as this type of fat doesn’t render well and doesn’t enhance the flavor. Then shape the brisket by cutting off any excess meat that may dry out or burn during smoking. Finally, trim the fat cap down to about 1/4″ thickness all around.
The Texas Crutch is a technique used to speed up cooking time and keep the brisket juicy and moist. After reaching “the stall,” where the internal temperature remains constant for some time, implement the Texas Crutch by wrapping the brisket tightly in foil or butcher paper. This helps retain moisture and heat, allowing the brisket to cook faster while staying tender.
Maintaining a steady temperature is key when smoking a brisket. Aim for around 250 degrees Fahrenheit for consistent results. Choose your wood wisely; oak is often recommended for its medium smoky flavor that complements beef well. Keep an eye on smoke production as well—thin blue smoke is ideal, while billowing white smoke can impart an unpleasant flavor. Finally, be patient and resist the urge to constantly check on the brisket. Slow and consistent heat produces the best results.
What items do I need to make a brisket?
To make a brisket, you will need the following items:
1. Brisket – preferably a prime (AAA) grade packer brisket
2. Trimming knife – preferably a narrow curved boning knife
3. Brisket rub – traditional Texas style rub of 50% coarse black pepper and 50% coarse Kosher salt
4. Smoker – set to 250 degrees F
5. Meat thermometer – to monitor the internal temperature of the brisket
6. Oak wood or your preferred smoking wood for flavor
7. Stainless steel bowl of water to keep the smoker humid and moist during cooking
8. Apple cider vinegar for spraying on dry areas of the brisket after 3-5 hours of smoking
9. Foil (optional) for implementing the Texas Crutch during “The Stall” phase
These items will help you trim, season, smoke, and monitor your brisket as it cooks to perfection.
How to trim a brisket (Very Important)
Trimming and preparing a brisket is a crucial step in making a proper brisket. It takes time and practice to master this part, but you will improve with each brisket you trim. Start by ensuring the brisket is very cold for easier trimming. Use a narrow curved boning knife to make the process of trimming the fat easier.
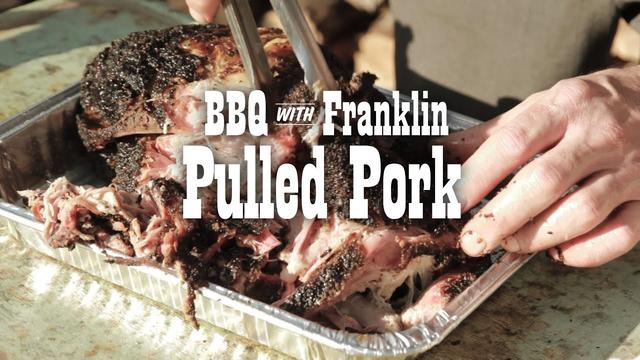
The brisket has two different sides – the flat (lean side) and the point (taller, fatty side). Aaron Franklin’s Masterclass provides a simple method for trimming that helps shape the brisket and ensures a more even cook. Remove most of the hard and thick fat on the underside of the brisket as it will not render and does not enhance the flavors. Shape the brisket by cutting off the end of the flat until there is at least 3/4″ of meat showing, as leaving this thin area can cause it to dry out and burn in the smoker. Round out the front of the point as much as possible to allow air and smoke to flow freely around it, avoiding any sharp points or angles that are prone to burning. Finally, trim down the fat cap to about 1/4″ thickness all around for that perfect amount of fat.
Here is a helpful video by Aaron Franklin demonstrating his method of trimming a brisket: [link]
Once trimming is complete, it’s time to move on to seasoning with rub:
Texas Style Brisket Rub Recipe
To make a Texas style brisket rub, you will need equal parts coarse black pepper and coarse Kosher salt. Mix these two ingredients together thoroughly. This simple rub is all you need to enhance the flavor of your brisket. Be sure to evenly spread the rub over the entire surface of the brisket, but be careful not to use too much. Let the brisket sit for up to an hour before cooking to allow the flavors to penetrate the meat.
Trimming and preparing a brisket is a crucial step in making a proper brisket. Take your time with this process, as it can greatly impact the final result. Start by removing any hard and thick parts of fat on the underside of the brisket that will not render during cooking. Shape the brisket by cutting off any excess meat or sharp points that may burn in the smoker. Finally, trim down the fat cap to a thickness of about 1/4 inch for optimal results.
When buying a brisket, it is important not to cheap out on quality. Look for prime (AAA) grade packer briskets, which will yield a more flavorful and tender end result. When selecting a brisket, do the “flop test” by picking it up from the middle and checking if it flops on the ends. This indicates good fat marbling throughout. Additionally, look for a brisket with at least 1/4-1/2 inch of consistent fat on the fat cap.
Smoking a brisket requires patience and understanding of smoke science. Keep your smoker at around 250 degrees F and use oak wood for a medium smoky flavor. Place the brisket in the smoker with the fat cap facing up and the point closer to the heat source. Use a meat thermometer to monitor the internal temperature, and resist the urge to constantly open the smoker and check on the brisket. Maintain thin blue smoke for optimal flavor and avoid billowing white smoke, which can give off an unpleasant taste.
When your brisket reaches around 160/165 degrees F and enters “the stall,” where it seems to plateau in temperature, it is time to use the Texas Crutch method. This involves wrapping the brisket tightly in foil to speed up cooking and keep it juicy. The foil helps retain moisture and heat, allowing the fat to render down more quickly. Some pitmasters prefer not to use foil, as it can result in a softer bark, so experiment with both methods to find your preference.
Learning how to smoke a brisket Texas style takes time, patience, and experimentation. Don’t be discouraged by initial failures; instead, use them as opportunities for growth and improvement. Keep refining your methods, seeking advice from experts like Aaron Franklin, and updating your techniques as you learn new information. With practice and dedication, you will eventually master the art of smoking a perfect Texas style brisket.
Should I Inject a Marinade in the Brisket?
Injecting a marinade into the brisket is a popular step that many Pitmasters choose to include in their cook. However, it is not necessary and ultimately comes down to personal preference. Some people believe that injecting a marinade can enhance the flavor and moisture of the brisket, while others prefer to let the natural taste of the beef and smoke shine through. If you do decide to inject a marinade, it can add another layer of complexity to your brisket, but be sure to choose flavors that will complement the beef rather than overpower it.
When injecting a marinade into the brisket, it is important to use a meat injector and inject evenly throughout the meat. This ensures that the flavors are distributed evenly and penetrate deep into the brisket. Keep in mind that injecting a marinade can also add extra moisture to the meat, so adjust your cooking times accordingly.
Ultimately, whether or not you choose to inject a marinade in your brisket is up to you. Experiment with different flavors and techniques to find what works best for your taste preferences.
Start the Smoking Process

Learning how to smoke a brisket can be a daunting task, but with time and research, you can master it. It is important to invest in a premium cut of brisket, such as a prime grade packer brisket. When selecting your brisket, do the “flop test” to ensure it has the right amount of fat marbling throughout. Trim the fat cap down to 1/4″ thickness all around to prevent excessive fat on the cooked brisket.
Before smoking the brisket, it is crucial to trim and prepare it properly. Use a narrow curved boning knife to remove most of the hard and thick part of fat on the underside of the brisket. Shape the brisket by cutting off any excess meat areas that may dry out and burn in the smoker. Trim the fat cap down to 1/4″ thickness all around for optimal results.
After trimming, apply a traditional Texas-style rub consisting of 50% coarse black pepper and 50% coarse Kosher salt. Evenly spread the rub over the brisket without overdoing it. Let the seasoned brisket sit on the counter for up to an hour before cooking.
Preheat your smoker to 250°F and insert a meat thermometer into the thickest part of the brisket. Place the brisket in the smoker with the fat cap facing up and smoke using oak wood for a medium smoky flavor. Maintain consistent heat and quality thin blue smoke throughout cooking time. After around 7 hours, you may experience “The Stall” where internal temperature plateaus. Implementing The Texas Crutch, which involves wrapping tightly in foil or butcher paper, can help speed up the cooking process and keep the brisket juicy and moist.
Smoker Setup
Setting up your smoker properly is crucial for smoking a brisket. Start by preheating your smoker to 250 degrees F, as this is the ideal temperature for cooking brisket. Use oak wood for a medium smoky flavor or hickory for a sweeter finish. Place the brisket in the smoker with the fat cap facing up and the point closer to the heat source. This will ensure even cooking throughout the brisket. To keep the moisture levels high, place a stainless steel bowl of water in the smoker with the brisket. This will help prevent the brisket from drying out and create a better bark on the meat.
Before smoking, it’s important to trim and prepare your brisket properly. Trim away any excess fat or hard parts of fat on the underside of the brisket, as they will not render down during cooking. Shape the brisket by cutting off any thin areas of meat that may dry out and burn in the smoker. Round out any sharp points or angles to prevent burning during smoking. Finally, trim down the fat cap to about 1/4 inch thickness all around for optimal flavor.
Once trimmed, it’s time to apply your rub to enhance the flavor of your brisket. For a traditional Texas style rub, mix equal parts coarse black pepper and coarse Kosher salt. Apply this rub evenly over the entire surface of the brisket but be careful not to overdo it as too much rub can overpower the meat. Letting the seasoned brisket sit at room temperature for up to an hour before cooking allows for better flavor absorption.
Many Pitmasters choose to inject their briskets with marinades to add extra moisture and flavor. However, if you prefer to let the natural taste of the beef and smoke shine through, you can skip this step. Injecting a marinade can sometimes lead to a mushy texture or overpowering flavors, so it’s a personal preference whether or not to inject your brisket.
Place the brisket in the preheated smoker with the fat cap facing up and insert a meat thermometer into the thickest part of the meat. Maintain a temperature of 250 degrees F throughout the smoking process. After about 3-5 hours, start spraying any dry areas of the brisket with apple cider vinegar to keep it moist. Around 7 hours into smoking, you may experience “The Stall,” where the internal temperature of the brisket remains steady for a while. This is normal and is caused by fat rendering down and cooling the meat. To speed up cooking during this stall, you can use “The Texas Crutch” by wrapping the brisket tightly in foil.
Remember to trust your meat thermometer and avoid constantly opening your smoker to check on the brisket. Patience is key as slow and consistent heat leads to the best results.
The Brisket Stall

The Brisket Stall is a natural occurrence that happens during the smoking process of a brisket. It occurs when the internal temperature of the brisket reaches around 160-165°F and then remains at that temperature for an extended period of time. This can last for several hours and can be a cause of concern for inexperienced BBQ enthusiasts. However, it is important not to panic during this stage.
During The Brisket Stall, the fat in the brisket is rendering down and creating a cooling effect on the meat, which slows down the cooking process. This is normal and actually helps to keep the brisket juicy and moist. It is important to maintain patience during this stage and trust the process.
To overcome The Brisket Stall, some pitmasters use a technique called the Texas Crutch. This involves wrapping the brisket tightly in foil or butcher paper to help speed up the cooking process and push through The Stall. However, there are differing opinions on whether this technique produces better results or not.
Overall, understanding The Brisket Stall and how to navigate through it is crucial for achieving a perfectly smoked brisket.
Brisket Texas Crutch
The Texas Crutch is a technique used to speed up the cooking process of the brisket, especially during its time-consuming stall. It involves wrapping the brisket tightly in aluminum foil, which helps trap moisture and heat, resulting in a juicier and more tender end product. Some pitmasters believe that using the Texas Crutch can affect the texture and bark of the brisket, while others swear by its effectiveness in producing a delicious result.
To use the Texas Crutch, once the brisket has reached a certain internal temperature (usually around 160-165°F), remove it from the smoker and wrap it tightly in aluminum foil. Place it back in the smoker and continue cooking until it reaches your desired internal temperature (usually around 195-205°F). This method can help reduce cooking time and ensure a moist and tender brisket.
Aluminum Foil Texas Crutch
The Texas Crutch involves wrapping the brisket tightly in aluminum foil during the cooking process. This helps to trap moisture and heat, speeding up the cooking time and preventing the brisket from drying out. To implement the Texas Crutch, carefully wrap the brisket in a double layer of aluminum foil, making sure it is tightly sealed. Place the wrapped brisket back in the smoker and continue cooking until it reaches your desired internal temperature. Many pitmasters recommend cranking up the heat at this point to help push through the stall and achieve a tender and juicy brisket.
After wrapping in foil, you can also add some liquid such as beef broth or apple juice to further enhance the moisture and flavors of the brisket. This liquid will steam inside the foil packet and infuse into the meat as it continues to cook. The Texas Crutch can significantly reduce cooking time, but some purists argue that it can result in a slightly softer bark on the outside of the brisket. It’s ultimately a personal preference whether or not to use this technique, but many backyard cooks swear by its effectiveness in producing a delicious smoked brisket.
Remember to always use caution when handling hot aluminum foil and be sure to allow for resting time before unwrapping and slicing your brisket. Resting allows the juices to redistribute throughout the meat, resulting in a more flavorful final product. Enjoy your perfectly smoked Texas-style brisket!
Butcher Paper Texas Crutch
Using butcher paper as a crutch for your brisket is another popular method. Once the brisket reaches the stall, wrap it tightly in butcher paper and place it back on the smoker. The butcher paper allows for some airflow, helping to maintain the bark while also keeping the moisture sealed in. This method can result in a more tender and flavorful brisket.
Once your brisket has reached an internal temperature of 200-205°F, it is time to remove it from the smoker and let it rest. Resting allows the juices to redistribute throughout the meat, resulting in a more moist and tender final product. Wrap the brisket in foil or butcher paper and place it in a cooler or insulated container for at least an hour, but ideally up to four hours.
When it’s time to slice your brisket, be sure to slice against the grain for maximum tenderness. The grain of the meat will run parallel to the length of the brisket, so make perpendicular cuts across this grain. Take your time when slicing to ensure even slices and enjoy your perfectly smoked Texas-style brisket!
Finishing the Brisket Cook

After implementing the Texas Crutch, you can continue cooking the brisket until it reaches an internal temperature of 195-203°F. This is when the connective tissues have fully broken down and the meat becomes tender and juicy. Keep in mind that every brisket is different, so use your meat thermometer to gauge when it’s done.
Once the desired internal temperature is reached, remove the brisket from the smoker and wrap it tightly in foil. Let it rest for at least one hour to allow the juices to redistribute throughout the meat. This resting period is crucial for a moist and flavorful brisket.
After resting, carefully unwrap the foil and transfer the brisket to a cutting board. Slice against the grain to ensure tender slices. Serve immediately and enjoy your perfectly smoked Texas-style brisket!
Remember, smoking a brisket takes time and practice. Don’t get discouraged if you don’t achieve perfection right away. With each cook, you’ll learn more about temperature control, smoke flavor, and trimming techniques that work best for you. Keep experimenting and refining your methods to create your own signature brisket recipe.
How to know when a brisket is done
To know when a brisket is done, you can use a meat thermometer to check the internal temperature of the thickest part of the brisket. The ideal temperature for a fully cooked brisket is around 195-205°F. At this temperature, the connective tissues in the meat have broken down, resulting in tender and juicy meat. Another way to determine if a brisket is done is by testing its tenderness. You can do this by inserting a probe or skewer into the meat and checking for little resistance. If it slides in easily without much effort, then your brisket is likely done. Lastly, you can also judge doneness by the appearance of the bark on the outside of the brisket. A well-cooked brisket will have a dark and caramelized bark that is slightly crispy to touch.
When it comes to slicing a smoked brisket, it’s important to slice against the grain for maximum tenderness. The grain refers to the direction of the muscle fibers in the meat. By cutting across these fibers, you are effectively shortening them and making each bite more tender.
Start by placing your brisket on a cutting board with the fat cap facing up. Use a sharp carving knife or slicing knife to make thin slices across the width of the brisket, perpendicular to its length. Aim for slices that are about ¼ inch thick.
As you slice, be sure to maintain an even pressure and smooth motion throughout. Avoid sawing back and forth or applying too much downward force as this can cause your slices to become jagged or uneven.
If you have any leftover smoked brisket, it’s important to store it properly to maintain its flavor and texture.
First, allow the brisket to cool down completely before storing. This helps prevent bacterial growth and keeps the meat fresh for longer.
Next, wrap the brisket tightly in plastic wrap or aluminum foil to seal in moisture. You can also place it in an airtight container if preferred.
Store the wrapped or sealed brisket in the refrigerator for up to 4-5 days. If you want to store it for longer, you can freeze it for up to 3 months. Just be sure to thaw it properly before reheating.
What Temperature Is Brisket Done?
The internal temperature of a brisket is the best indicator of when it is done. The general guideline is to cook the brisket until it reaches an internal temperature of 195-205 degrees Fahrenheit. This ensures that the connective tissues have broken down and the meat is tender and juicy. However, it’s important to note that every brisket is different, and some may be done at slightly lower or higher temperatures. Use a reliable meat thermometer to accurately measure the internal temperature of the brisket.
Once your brisket has reached the desired internal temperature, it’s crucial to let it rest before slicing. This allows the juices to redistribute throughout the meat, resulting in a more flavorful and tender brisket. Ideally, you should let the brisket rest for at least 1 hour, but longer resting times of 2-3 hours are even better.
To rest the brisket, remove it from the smoker or grill and wrap it tightly in aluminum foil or butcher paper. Place it in a cooler or insulated container to keep it warm during the resting period.
When you’re ready to slice the brisket, make sure to cut against the grain for maximum tenderness. The grain refers to the direction of muscle fibers in the meat. Look for lines running across the flat (lean) side of the brisket and slice perpendicular to those lines.
By following these steps, you’ll ensure that your smoked Texas-style brisket turns out perfectly cooked and delicious. Remember, practice makes perfect, so keep experimenting with different techniques and flavors until you find your own signature recipe.
How to rest a brisket
Resting a brisket is an important step in the cooking process. After you have smoked the brisket to perfection, it needs time to rest before slicing and serving. This allows the juices to redistribute throughout the meat, resulting in a more tender and flavorful final product.
To rest a brisket, remove it from the smoker and wrap it tightly in aluminum foil or butcher paper. Place it in a cooler or insulated container to keep it warm. Let the brisket rest for at least 1 hour, but ideally 2-4 hours.
During this resting period, the temperature of the brisket will continue to rise slightly, reaching its final desired internal temperature. The rest also allows any residual heat to finish cooking the meat and helps retain moisture.
Once the resting period is over, carefully unwrap the brisket and transfer it to a cutting board. Use a sharp knife to slice against the grain for maximum tenderness. Serve immediately and enjoy your perfectly smoked Texas-style brisket!
How Long to Rest Brisket
After the brisket is done cooking, it is important to let it rest before slicing into it. This allows the juices to redistribute and ensures a more tender and flavorful final product. The general rule of thumb for resting brisket is to let it rest for about 1 hour for every 1 pound of meat. So if you have a 10-pound brisket, you should let it rest for around 10 hours.
During the resting period, you can wrap the brisket in foil or butcher paper to help retain heat. It is best to place the wrapped brisket in a cooler or insulated container to keep it warm. This resting time also gives you a chance to prepare any sides or sauces that will accompany your meal.
Resting the brisket is crucial for achieving the best results, so be patient and resist the temptation to cut into it right away. The wait will be well worth it when you bite into that tender and juicy smoked brisket.
How to cut a brisket
Cutting a brisket properly is essential to ensure that you get the most out of this flavorful cut of meat. Here are some steps to guide you in cutting a brisket:
1. Let the brisket rest: After smoking the brisket, it is important to let it rest for at least 30 minutes before cutting into it. This allows the juices to redistribute and ensures that the meat stays tender.
2. Identify the grain: The first step in cutting a brisket is identifying the direction of the grain. The grain refers to the lines or fibers running through the meat. It’s important to cut against the grain for maximum tenderness.
3. Separate the point and flat: The brisket consists of two main parts – the point (the fattier, more marbled section) and the flat (the leaner section). To separate these two parts, locate the layer of fat that separates them and make a shallow cut along this line.
4. Slice against the grain: Once you have separated the point and flat, slice each section against the grain. This means cutting perpendicular to the lines of muscle fibers. Slicing against the grain helps break up those tough fibers and makes for more tender bites.
5. Trim excess fat: If desired, trim any excess fat from each slice before serving. Some people prefer leaving some fat for added flavor and moisture, while others prefer leaner slices.
Remember, practice makes perfect when it comes to cutting a brisket. It may take a few tries before you feel confident in your slicing technique, but with time and experience, you’ll be able to master this skill and serve up perfectly sliced brisket every time.
Brisket Sides and Sauces
When serving brisket, it’s important to have some delicious sides and sauces to accompany it. Some popular options include:
– Coleslaw: The creamy and tangy flavors of coleslaw pair perfectly with the rich and smoky taste of brisket.
– Potato Salad: A classic barbecue side dish, potato salad adds a cool and refreshing element to balance out the richness of the meat.
– Baked Beans: Sweet and savory baked beans are a staple at any barbecue feast, providing a satisfying complement to the smoky flavors of the brisket.
– Pickles: Pickles add a crunchy and tangy element that cuts through the richness of the meat, enhancing its overall flavor profile.
– BBQ Sauce: Whether you prefer a tangy vinegar-based sauce or a sweet and sticky molasses-based one, BBQ sauce is essential for adding extra flavor and moisture to your brisket.
Remember, these are just suggestions and you can get creative with your sides and sauces based on personal preferences. Experiment with different flavors and textures to find your perfect combination.
Brisket Leftovers
After smoking a large brisket, it is common to have leftovers. These leftovers can be transformed into delicious meals for the next day. One popular option is to make brisket sandwiches, using the tender and flavorful meat as the filling. Another favorite leftover dish is brisket tacos, where the smoky meat is paired with fresh toppings and served in warm tortillas. Brisket can also be added to salads or used as a topping for loaded baked potatoes. The possibilities are endless when it comes to repurposing leftover brisket into new and tasty meals.
How To Smoke a Brisket – Texas Style

Smoking a brisket can be challenging, but with time and research, you can master the art. Learning from BBQ fanatics, doing your own research, and even taking a Masterclass on BBQ can help improve your brisket-making skills.
When it comes to smoking a brisket, it’s important to allocate enough cooking time. A general rule of thumb is 1 to 1.5 hours per pound of brisket, so plan for at least 10-14 hours of cooking time to avoid keeping your guests waiting late into the night.
Brisket is a cut of meat that contains a lot of connective tissue, which is why it needs to be cooked low and slow. It’s recommended to buy a prime grade packer brisket for the best results. When selecting a brisket, look for one that “flops” on the ends when picked up in the middle and has at least 1/4″-1/2″ of consistent fat on the fat cap.
Equipment
– Smoker: You will need a smoker to smoke the brisket. Choose one that you are comfortable with and can maintain a consistent temperature.
– Meat Thermometer: A reliable meat thermometer is crucial for monitoring the internal temperature of the brisket to ensure it is cooked properly.
– Stainless Steel Bowl: This is used to hold water in the smoker to help keep the brisket moist during the cooking process.
– Spray Bottle: Fill a spray bottle with apple cider vinegar to spritz the dry areas of the brisket during smoking.
– Boning Knife: A narrow curved boning knife works best for trimming excess fat from the brisket.
– Foil (optional): The Texas Crutch method involves wrapping the brisket in foil during cooking, so having foil on hand is useful if you choose to use this technique.
Start by trimming off excess fat from the brisket, focusing on removing any thick, hard layers of fat that won’t render or enhance flavor. Shape the brisket by cutting off the end of the flat until there is at least 3/4″ of meat showing and rounding out any sharp points or angles. Trim down the fat cap to about 1/4″ thickness all around. Once trimmed, apply a rub consisting of 50% coarse black pepper and 50% coarse kosher salt, or use your preferred homemade or store-bought rub. Let the seasoned brisket sit at room temperature for up to an hour before cooking.
Preheat your smoker to 250 degrees F and insert a meat thermometer into the thickest part of the brisket, making sure it’s in contact with meat and not fat. Place the brisket in the smoker with the fat cap facing up and cook with thin blue smoke for optimal flavor. To keep the brisket moist, add a stainless steel bowl of water to the smoker. After 3-5 hours, spray any dry areas of the brisket with apple cider vinegar. Increase the smoker temperature to 265F after 3-4 hours to cook the point more evenly. Avoid constantly opening the smoker to check on the brisket and maintain a slow and consistent heat.
After around 7 hours, you may notice that the internal temperature of the brisket has stalled at around 160/165F. This is normal and referred to as “The Stall.” To overcome this stall, implement the Texas Crutch method. Wrap the brisket tightly in foil and return it to the smoker. The foil helps speed up the cooking process and keeps the brisket juicy and moist. Cook until the internal temperature reaches about 195F for slicing or 205F for shredding. Remove from the smoker, let it rest for about an hour, then slice or shred and serve.
Ingredients
– Brisket (prime grade is recommended)
– Coarse black pepper
– Coarse Kosher salt
– Oak wood for smoking
– Apple cider vinegar
Instructions
1. Start by trimming and preparing the brisket. Make sure the brisket is very cold before trimming, as it will be easier to work with. Use a narrow curved boning knife to trim off any excess fat and shape the brisket.
2. Once the trimming is complete, apply the Texas style brisket rub (50% coarse black pepper and 50% coarse Kosher salt) evenly over the brisket. Let it sit on the counter for up to an hour before cooking.
3. Preheat your smoker to 250 degrees F, using oak wood or your preferred smoking wood for flavor. Place a stainless steel bowl of water in the smoker to help keep the brisket moist.
4. Insert a meat thermometer into the thickest part of the brisket, making sure it goes into the meat and not just the fat. Place the brisket in the smoker with the fat cap facing up and cook at 250 degrees F.
5. After 3-5 hours of smoking, start spraying any dry areas of the brisket with apple cider vinegar to keep it moist. After 3-4 hours, increase the smoker temperature to 265 degrees F to cook the point more evenly.
6. Be patient and avoid constantly opening your smoker to check on the brisket. Trust your meat thermometer and maintain a consistent heat for best results.
7. Around 7 hours into smoking, you may experience “The Stall” where the internal temperature of the brisket plateaus around 160/165F. This is normal and indicates that fat is rendering down, creating a cooling effect on the meat.
8. To speed up cooking through “The Stall,” implement The Texas Crutch method by wrapping your brisket tightly in foil or butcher paper and returning it to the smoker.
9. Continue cooking until desired internal temperature is reached (usually around 195-203 degrees F for a tender brisket). Remove from the smoker and let it rest for at least 30 minutes before slicing.
10. Slice the brisket against the grain and serve with your favorite BBQ sauce or enjoy it as is.
Nutrition
Brisket is a rich source of protein, providing about 27 grams per 3-ounce serving. It is also high in vitamins and minerals such as iron, zinc, and B vitamins. However, it is important to note that brisket is a fatty cut of meat and should be consumed in moderation as part of a balanced diet.
In conclusion, smoking a brisket is a flavorful and rewarding cooking technique that requires patience and attention to detail. With the right equipment, seasoning, and cooking time, you can achieve tender and mouthwatering results. Remember to enjoy this culinary journey while prioritizing safety and health by practicing responsible smoking habits.
Learn More About Grilling
If you want to learn more about grilling, check out these other helpful resources!