Master the art of smoking ribs on your Weber kettle with our expert tips and tricks. From selecting the perfect cuts to achieving mouthwatering flavors, unlock the secrets to creating tender and juicy smoked ribs that will leave your guests craving for more. Get ready to elevate your grilling game and become a true pitmaster with our comprehensive guide.
Smoking Pork Ribs on the Weber Kettle: Easy, Simple Recipe
Smoking pork ribs on a Weber Kettle is a simple and easy process that can yield delicious results. Whether you prefer baby back ribs or spare ribs, there are certain steps you can follow to ensure your ribs turn out tender and flavorful. It is important to choose fresh, non-enhanced ribs for the best taste. To prepare the ribs, remove the membrane, trim any excess meat or bones, and apply a simple rub of kosher salt, cracked peppercorns, garlic powder, and dark brown sugar.
When it comes to smoking on a charcoal grill like the Weber Kettle, maintaining a temperature of 250°F is ideal. You can achieve this by using methods like the Slow N’ Sear, Minion method, or Charcoal snake. It’s important to position the ribs in the cool zone of the grill and avoid opening the lid too often. Adding wood chunks like cherry and pecan can enhance the smoke flavor of the ribs.
To determine when the ribs are done, you can use tests like the bend test and tear test rather than relying solely on temperature. A 45-degree bend indicates tenderness, and if the bone pulls cleanly away from the meat, they’re likely done. The overall cooking time may take around 3-4 hours depending on various factors.
What to Look for in Pork Ribs?
When choosing pork ribs for smoking, there are a few things to consider. First, you have the option of baby back ribs or spare ribs. Baby back ribs are smaller and leaner, while spare ribs are larger and fattier. The choice between the two comes down to personal preference.
Next, it’s important to look for fresh, unfrozen ribs if possible. Avoid “enhanced” ribs, which have been injected with a solution that can make them overly salty. Trim any excess fat or scraggly pieces from the ribs before smoking.
Finally, when selecting a rib rub, keep it simple. Some recipes call for a variety of spices and flavorings, but I prefer a mix of kosher salt, cracked peppercorns, garlic powder, and dark brown sugar. Adjust the rub to your own taste preferences.
Avoid “Enhanced” Ribs
When it comes to smoking pork ribs on the Weber Kettle, it’s important to choose the right type of ribs. One thing to avoid is “enhanced” ribs, which are commonly found in grocery stores. These ribs have been injected with a solution of water, phosphates, salt, and flavorings. The injection can make the ribs taste overly salty when combined with a salt-based rub. It’s best to opt for fresh, non-enhanced ribs if possible. Even frozen ribs are better than enhanced ones.
Before smoking the ribs, there are a few steps you should take to prepare them properly. Start by patting dry both the meat side and bone side of the ribs with a paper towel. This helps make the surface easier to work with, especially when removing the tough silver skin membrane. To remove the membrane, use a butter knife and spoon to lift it off completely. Additionally, consider trimming any excess flap meat or scraggly pieces from the rack of ribs.
When it comes to rib rubs, simplicity is key. While many recipes call for a variety of spices and flavors, I prefer a simple rub consisting of kosher salt, cracked peppercorns, garlic powder, and dark brown sugar. This combination enhances the flavor without overpowering the natural taste of pork. However, feel free to experiment with different rubs and adjust them according to your personal taste preferences.
Trimming the Ribs
Before smoking the pork ribs, it is important to properly trim them. Start by pat drying the meat side and bone side of the ribs with a paper towel. This will make the surface of the meat easier to work with, especially when removing the tough silver skin or membrane. Use a butter knife and spoon to lift and remove the membrane from between the two layers.
Next, check for any excess flap meat, scraggly pieces, or small bones that can be trimmed off. If present, use a sharp knife to remove these parts. It is also recommended to remove any bones with little meat on them and any scraggly pieces that are prone to burning during smoking.
Overall, trimming helps create a more visually appealing rack of ribs and ensures that all parts cook evenly. It is best to keep things simple with rib rubs, using a combination of kosher salt, cracked peppercorns, garlic powder, and dark brown sugar. However, personal taste preferences can vary so feel free to adjust the rub accordingly.
Applying Rub to Ribs
Before smoking the ribs, it is important to apply a rub to enhance their flavor. The author of the recipe prefers to keep the rub simple, using a combination of kosher salt, cracked peppercorns, garlic powder, and dark brown sugar. The rub can be applied liberally on both sides of the ribs, ensuring that all areas are covered. However, you can adjust the amount of rub according to your personal taste preferences.
If you prefer using a commercial rib rub instead of making your own, feel free to do so. Just remember that some commercial rubs may contain a variety of spices that could overpower the natural flavor of the pork. Apply the commercial rub generously if desired.
Setting Up the Weber Kettle to Smoke

When setting up your Weber Kettle to smoke pork ribs, there are a few steps you should follow. First, you’ll want to prepare your charcoal grill by adding unlit lump charcoal to the basket or lighting a few pieces in a charcoal chimney. The goal is to achieve a smoking temperature of around 250°F.
Once the charcoal is lit, place the lid on the kettle and open both the intake damper (bottom vent) and exhaust damper (top vent) completely. This allows for maximum airflow. As the temperature climbs to around 200-225°F, you can start making adjustments to the vents.
Begin by closing the intake damper halfway between the first and second dot once the grill reaches 250°F. Then, close the exhaust damper halfway as well. If you don’t have a lid thermometer that accurately measures temperature above your food, you can also dangle a meat probe in the exhaust damper to monitor heat levels.
Setting Up the Vents to Smoke
To smoke pork ribs on a Weber Kettle, it’s important to set up the vents properly for optimal airflow. This will help maintain a consistent temperature throughout the smoking process.
First, start by opening both the intake and exhaust vents completely. This allows maximum airflow into and out of the kettle. Once the temperature reaches around 200-225F, you can make adjustments to the vents.
Begin by adjusting the intake damper (bottom vent). Close it halfway between the first and second dot. This will help regulate the amount of oxygen getting into the kettle and control the temperature.
Once the grill reaches your desired smoking temperature, which is typically 250F for pork ribs, close the exhaust damper (top vent) halfway. This will regulate how much smoke and heat escapes from the grill.
It’s important to note that these settings may vary depending on your specific grill and weather conditions. It may take some trial and error to find what works best for you.
Remember not to constantly open the lid or peak at the meat too often as this can affect cooking time and temperature. Try to minimize lid openings and only add more wood chips or chunks every hour and a half or so.
By setting up your vents correctly, you’ll be able to achieve consistent heat and smoke levels, resulting in perfectly smoked pork ribs on your Weber Kettle.
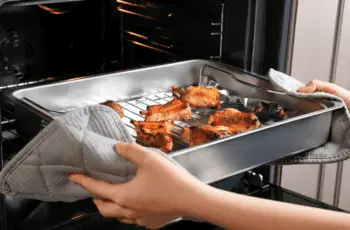
Putting the Ribs on the Weber Kettle
When smoking pork ribs on the Weber Kettle, it is important to properly prepare and set up the ribs for cooking. Start by pat drying the meat side and bone side of the ribs with a paper towel. This helps to make the surface of the meat easier to work with, especially when removing the tough silver skin membrane.
To remove the membrane, use a butter knife to initially lift it, then continue lifting with the underside of a spoon. Tear the membrane horizontally using a paper towel so that it pulls away from the bones. If there is a flap of meat or scraggly pieces on the ribs, you can trim them off using a sharp knife.
Next, apply your preferred rib rub to both sides of the ribs. The author suggests using a simple mixture of kosher salt, cracked peppercorns, garlic powder, and dark brown sugar. However, you can also use a commercial rib rub if desired. Make sure to coat both sides of the ribs evenly with the rub.
With your Weber Kettle set up for smoking at 250F, place the prepared ribs in the cool zone of your grill. It is recommended to scrunch up the meat so that more meat is on top of the bones rather than on the sides. This makes it easier to probe and cook evenly. Avoid opening the lid frequently to maintain consistent temperature and smoke levels.
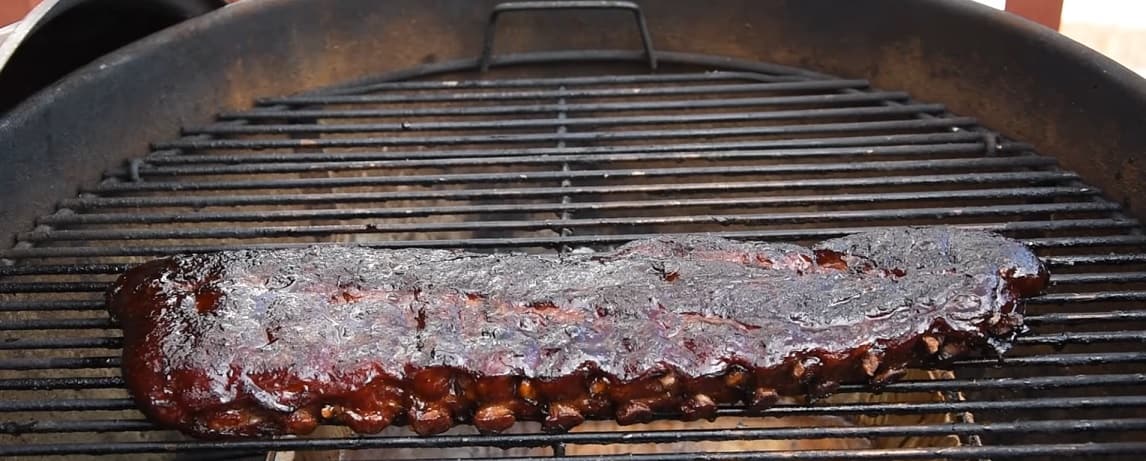
After smoking for several hours and achieving an internal temperature of around 175-180F, you can choose whether or not to wrap your ribs in foil. Foil wrapping helps reach tenderness faster but may soften or wash away some spices. If you decide to wrap, lay out a sheet of aluminum foil sprayed with water for thermal conductivity and moisture retention.
Finally, continue cooking wrapped ribs for about 30-45 minutes until they reach your desired tenderness. You can use the bend test or tear test to determine if the ribs are done. Ribs that bend at a 45-degree angle or more and bones that cleanly pull away from the meat indicate that they are ready to be enjoyed.
Checking on the Ribs

Throughout the smoking process, it’s important to minimize how often you open the lid and peek at the ribs. The saying “if you’re lookin’ you ain’t cookin'” holds true here. However, there are a few instances where it may be necessary to check on the ribs.
If the temperature inside the kettle is running too hot, you can briefly open the lid to allow some heat to escape. You can also remove a few of the lit coals with tongs to help bring down the temperature. Remember, maintaining a steady temperature is crucial for smoking ribs.
Aside from adjusting temperature, you’ll need to periodically add more wood chunks for smoke. It’s recommended to do this every hour and a half or so. Simply open the lid, place a new wood chunk on top of the lit coals, and close the lid again.
Wrapping the Ribs
Once the ribs have reached the desired color and internal temperature, it’s time to wrap them. Wrapping the ribs helps to tenderize the meat and lock in moisture. While some recipes suggest using butcher paper, I find that foil works just as well.
To wrap the ribs, lay out a sheet of aluminum foil, preferably heavy duty. Spritz some water on the surface of the foil to aid in thermal conductivity and create steam inside the wrap. This will help to further break down the connective tissues and make the ribs even more tender.
Place the ribs meat side down on the foil and tightly wrap them, ensuring there are no gaps or openings for steam to escape. The accumulated fat and water from the ribs will also collect inside the wrap, further enhancing flavor and juiciness.
Determining When Ribs are Done
Determining when ribs are done can be a bit subjective and depends on personal preference. However, there are a few tests you can use to gauge their doneness. One test is the bend test, where you pick up the ribs from one end and allow them to bend. Ribs that are done should bend at a 45-degree angle or more.
Another test is the tear test, where you try to pull a bone away from the meat. If the bone pulls cleanly away from the meat, they’re likely done. You can also use a probe thermometer or toothpick to poke between the bones – if it slides through easily, they’re likely done.
It’s important to note that ribs typically finish somewhere between 195-205F, but temperature alone isn’t always an accurate indicator of doneness. It’s best to use a combination of these tests and your own judgment to determine when your ribs are perfectly cooked and ready to be enjoyed.
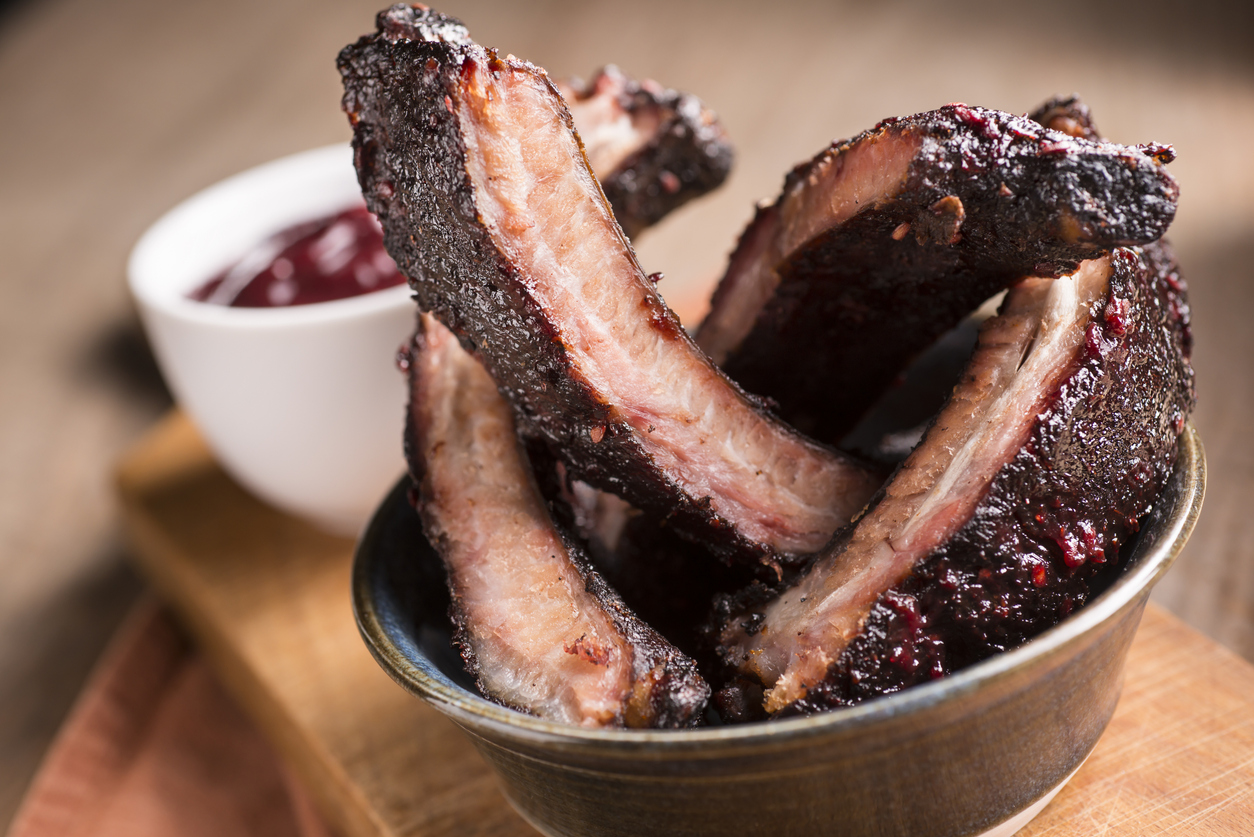
Saucing and Resting Ribs
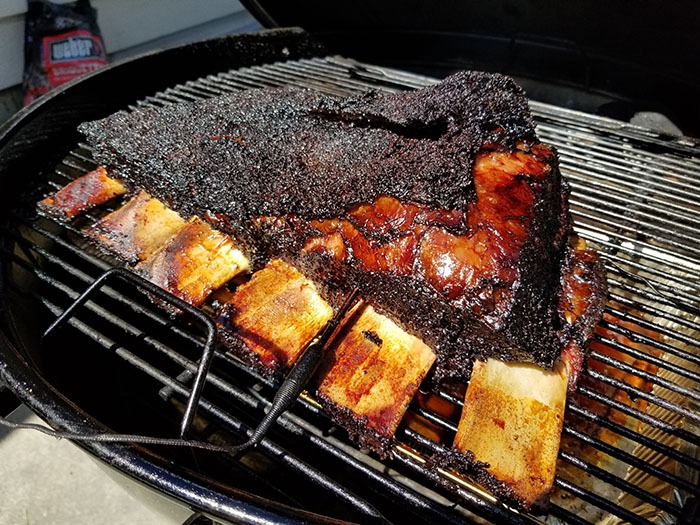
After the ribs have reached the desired doneness, it’s time to sauce them. I personally like to use a simple barbecue sauce, but you can use any sauce of your choice. Brush the sauce onto both sides of the ribs and let them cook for another 10-15 minutes to allow the sauce to caramelize.
Once the ribs are sauced, remove them from the grill and let them rest for about 10 minutes. This allows the juices to redistribute throughout the meat, resulting in juicier and more flavorful ribs. During this resting period, you can also brush on more sauce if desired.
When ready to serve, cut the rack of ribs into individual portions and enjoy! The meat should be tender and juicy, with a delicious smoky flavor. Serve with your favorite sides such as coleslaw, baked beans, or cornbread for a complete meal.
Overall, smoking pork ribs on a Weber Kettle is a simple and easy process that yields fantastic results. With proper preparation and cooking techniques, you can achieve perfectly smoked ribs that will impress your family and friends.
Smoked Pork Ribs on the Weber Kettle

Smoking pork ribs on the Weber Kettle is an easy and simple recipe that can be enjoyed by all experience levels. Whether you prefer baby back ribs or spare ribs, this guide covers everything you need to know about smoking them on the kettle. It is recommended to use fresh ribs rather than enhanced ones, as they tend to have a better flavor. Before smoking, it is important to remove the membrane, trim scraggly pieces, and remove small bones for optimal results.
When it comes to seasoning the ribs, keeping it simple is key. A rub made of kosher salt, cracked peppercorns, garlic powder, and dark brown sugar is a popular choice for enhancing the flavor of the meat. Smoking on a charcoal grill can be done using various methods such as the Slow N’ Sear or the Minion method. Maintaining a temperature of 250F is ideal for smoking the ribs.
During the smoking process, it’s important to minimize opening the lid too often to ensure even cooking and smoke absorption. Adding wood chunks like cherry and pecan can enhance both color and flavor. Once the meat reaches an internal temperature of around 175-180F and develops a desired bark, it can be wrapped in foil for faster tenderization. The ribs are considered done when they pass the bend test and tear test.
Equipment
– Weber Kettle grill
– Charcoal (lump or briquettes)
– Wood chunks for smoking (such as cherry or pecan)
– Aluminum foil or butcher paper
– Knife for trimming ribs
– Paper towel for pat drying ribs
– Butter knife and spoon for removing membrane
– Rib rub ingredients (kosher salt, cracked peppercorns, garlic powder, dark brown sugar)
– Optional: meat probe thermometer
Ingredients
– Pork ribs (baby back or spare ribs)
– Kosher salt
– Cracked peppercorns
– Garlic powder
– Dark brown sugar
– Wood chunks for smoking (cherry, pecan, etc.)
– Aluminum foil
Note: The specific quantities of each ingredient will vary depending on the amount of ribs being prepared.
Instructions
1. Start by pat drying the meat side and the bone side of the ribs with a paper towel to make the surface easier to work with.
2. Use a butter knife to lift the tough silver skin, or membrane, off the rack of ribs. Use the underside of a spoon to continue lifting and remove the entire membrane.
3. Remove any flap meat or scraggly pieces that may burn when smoked. Trim small bones and remove any bone with little meat on it.
4. Prepare your rib rub by mixing kosher salt, cracked peppercorns, garlic powder, and dark brown sugar together. Apply roughly half of this mixture to both sides of the ribs.
5. Set up your charcoal grill for smoking at a temperature of 250F using either the Slow N’ Sear, Minion method, or Charcoal snake technique. Adjust vent dampers as necessary to maintain temperature.
6. Place the ribs on the cool zone of the grill, scrunching them up so that more meat is on top of the bones rather than on the sides.
7. Avoid opening the lid too often while smoking to maintain consistent temperature and smoke. Add wood chunks every hour and a half for additional smoke flavor.
8. Once internal temperature reaches around 175-180F and bark is set, you can choose to wrap the ribs in foil or butcher paper for faster tenderness if desired.
9. If wrapping in foil, lay out a sheet of heavy-duty aluminum foil sprayed with water for thermal conductivity. Wrap tightly and continue cooking for another 30-45 minutes.
10. Check for doneness using either the bend test (ribs should bend at least 45 degrees) or the tear test (bone should pull cleanly away from the meat).
11. Remove the ribs from the grill and let them rest for a few minutes before slicing and serving.
In conclusion, smoking ribs on a Weber kettle is a fantastic way to achieve deliciously tender and flavorful meat. With the right techniques and equipment, anyone can master this art form. Whether you’re a seasoned pitmaster or a novice griller, the Weber kettle offers versatility and convenience for achieving mouthwatering smoked ribs that will impress friends and family alike. So fire up the grill, grab your favorite rubs and sauces, and get ready to indulge in some finger-licking goodness!
Learn More About Grilling
If you want to learn more about grilling, check out these other helpful resources!