“Decoding the Perfect Jerky: Unveiling the Ideal Temperature for Dehydration”
How to Make Beef Jerky in a Dehydrator: A Complete Guide (with Pictures!)
Making beef jerky in a dehydrator may seem like a complicated process, but it is actually quite simple. In this complete guide, we will cover everything you need to know about making beef jerky in a dehydrator. This information is based on my experience of making beef jerky for the past 16 years.
The first step in making beef jerky is choosing the right cut of beef. You want a lean and cheap cut of meat, such as top round or london broil. These cuts lack intramuscular fat, which helps with preservation. It’s also important to slice the meat against the grain to achieve tender jerky. Slicing the meat when it’s partially frozen makes it easier to cut into thin slices.
Next, you’ll need to marinate the meat. There are endless options for marinades, but salt is an essential ingredient as it helps kill microbes. Many recipes use soy sauce or teriyaki sauce because they contain lots of salt. However, you can experiment with different flavors to suit your taste.
After marinating the meat overnight, it’s time for pre-heat treating. This step involves heating the beef jerky in an oven at 325F-375F until it reaches an internal temperature of 158F. This kills bacteria and ensures food safety.
Once pre-heat treated, transfer the jerky to your dehydrator set at around 140F. The drying time will vary depending on the thickness of your jerky slices, but thinner pieces typically take around 3-5 hours.
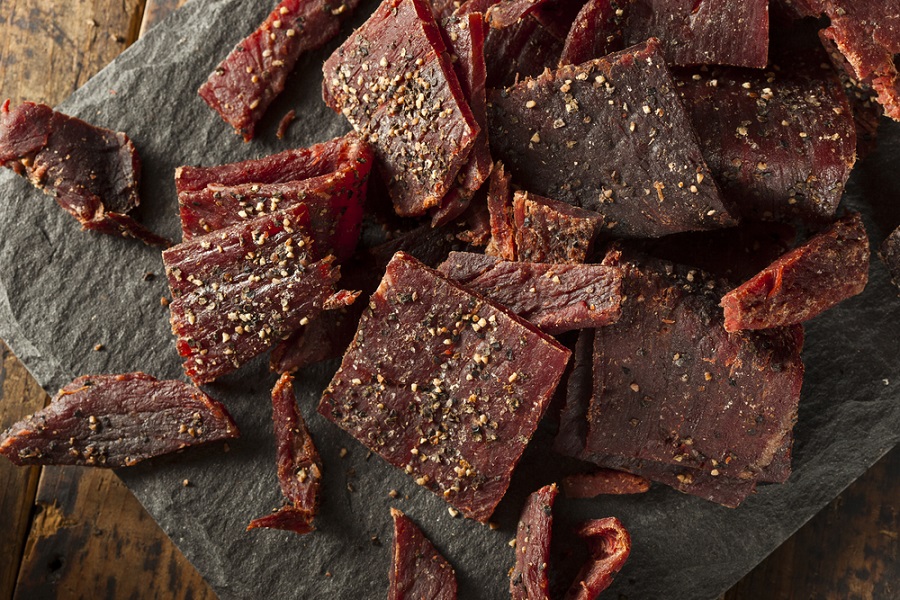
To determine if your jerky is done, perform a bend test by cooling a piece and bending it. Dry and spider web-like texture indicates that the jerky is ready.
Follow these steps and enjoy homemade beef jerky made in a dehydrator.
Which Cuts are Best for Jerky?
When it comes to making beef jerky in a dehydrator, the best cuts of beef to use are those that are lean and affordable. While some cuts like tenderloin may lack intramuscular fat and make great jerky meat, they can be quite expensive. Instead, opt for cuts like top round or London broil, which are both lean and inexpensive. It’s important to choose cuts of beef that have minimal fat content, as fat can go rancid quickly and affect the preservation of the jerky.
To determine the best way to slice your meat for jerky, consider the type of jerky you prefer. If you like soft and tender jerky, slice against the grain of the meat. To identify the grain direction of the meat, look at how the muscle fibers run on the surface. Slicing the meat when it’s partially frozen can also make slicing easier.
The thickness of the slices is crucial for both taste and drying time in your dehydrator. It is generally recommended to slice the meat between 1/8 to 1/4 inch thick. Slicing it too thin may result in brittle jerky, while slicing it too thick can lead to longer drying times.
When it comes to marinades for beef jerky recipes, there are endless options. Most recipes include salt as a curing agent to kill microbes and ensure food safety. Soy sauce and teriyaki sauce are commonly used in many recipes due to their high salt content. However, feel free to experiment with different flavors and ingredients based on your preferences.
To create a marinade for your beef jerky recipe, weigh out 40% of the meat’s weight in water and factor in a salinity percentage (typically 2.25-2.5% of the combined weight of meat and water) using kosher salt or other forms of salt. You can then add other ingredients like sugar or spices based on your desired flavor profile.
Once the meat is marinated, it’s important to pre-heat treat it before placing it in the dehydrator. Pre-heat treating involves heating the jerky in an oven to an internal temperature of 158°F for approximately 10 minutes. This process ensures a 7-log reduction, instantly killing bacteria and ensuring food safety. After pre-heat treating, you can then transfer the jerky to the dehydrator and set it to a temperature between 130-160°F for drying.
The drying time will vary depending on factors like the thickness of the slices and personal preference for texture. It’s recommended to start checking after around 3 hours, especially for thinner slices. The jerky is considered done when it feels dry and has a cross-section that features “spider webbing” rather than being wet or rubbery.
Overall, making beef jerky in a dehydrator may seem involved but is relatively simple once you understand the process. Choosing lean cuts of beef, slicing against the grain, marinating with salt and other desired ingredients, pre-heat treating in an oven, and drying in a dehydrator are key steps to follow for delicious homemade beef jerky.
Slicing Meat for Beef Jerky
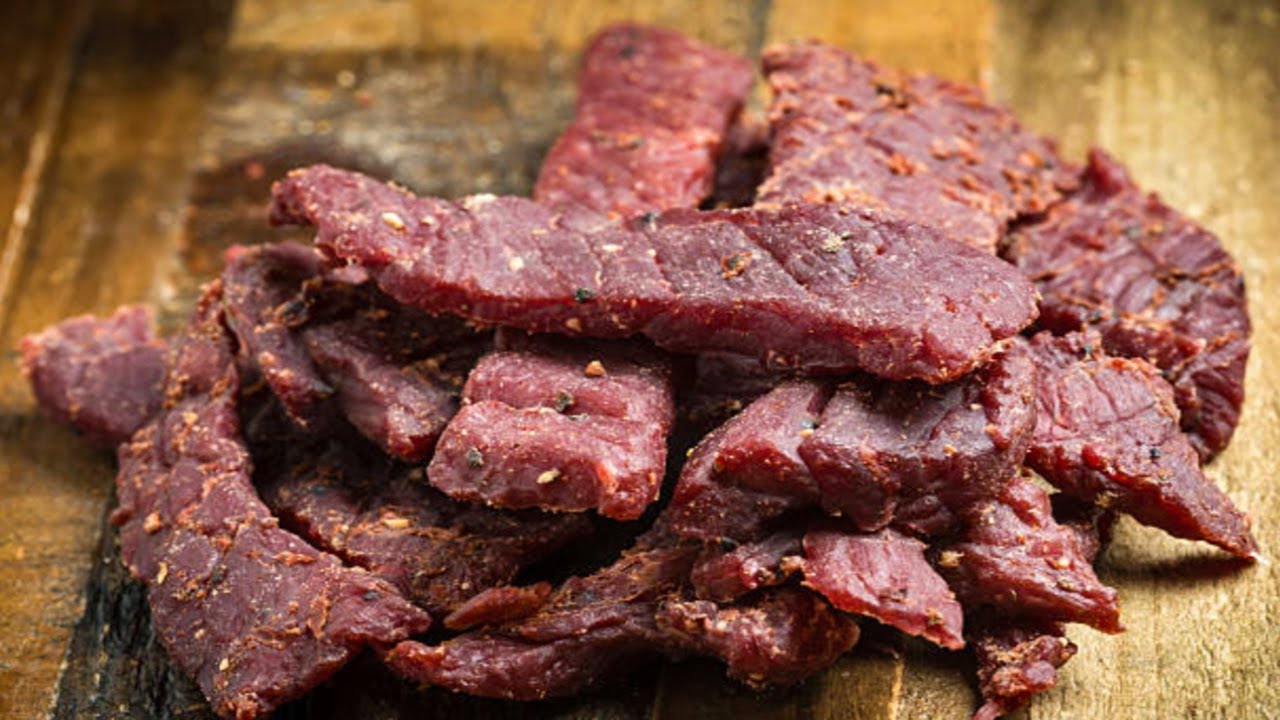
Slicing meat for beef jerky is an important step in the process. It is recommended to use lean cuts of beef that are also cheap, such as top round or london broil. These cuts lack intramuscular fat, which can go rancid quickly and affect the preservation of the jerky. The meat should be sliced against the grain to achieve a tender and soft texture. Slicing the meat when it is somewhat frozen can make it easier to cut into thin slices, around 1/8 – 1/4 inch thick.
The subheading should be used for the next paragraph.
How to Make a Marinade (Jerky Curing)
Making a marinade for beef jerky is an essential step in the curing process. The marinade not only adds flavor to the jerky but also helps preserve it. There are countless options when it comes to marinades, with variations in sweetness, spiciness, and savory flavors.
However, one common ingredient in most beef jerky recipes is salt. Salt acts as a natural preservative by killing microbes and preventing spoilage. Soy sauce and teriyaki sauce are often used in beef jerky recipes because they contain high levels of salt.
To make a basic marinade, start by weighing the sliced meat for your beef jerky. Calculate 40% of the meat’s weight and measure out that amount of water. For example, if you have 1 pound of meat, you would weigh out 0.4 pounds (or 181 grams) of water.
Why Pre-heat Treating is Important Before the Dehydrator
Pre-heat treating is important before using a dehydrator for making beef jerky because it helps to ensure that any harmful bacteria present in the meat are killed. By preheating the meat to an internal temperature of 158F in an oven, the meat achieves a 7log reduction in bacteria, making it safe to consume. This process takes about 10 minutes in an oven at 325F-375F.
The pre-heat treatment is necessary because dehydrators typically do not reach temperatures high enough to kill bacteria instantly. By preheating the meat, you eliminate any potential risks of foodborne illnesses from consuming undercooked or contaminated jerky.
It’s important to note that this pre-heat treatment has no perceivable downsides and does not affect the taste or texture of the jerky. It is a necessary step to ensure food safety and compliance with HACCP guidelines for producing beef jerky.
How to Pre-Heat Treat Your Meat
The pre-heat treatment is an important step before using your dehydrator to make beef jerky. It involves heating the meat to an internal temperature of 158F in an oven. This process ensures that harmful bacteria are instantly killed, making the jerky safe to consume.
To pre-heat treat your meat, follow these steps:
- Preheat your oven to 325F-375F.
- Cover a baking sheet with aluminum foil for easy clean-up.
- Place oven-safe cooling racks on top of the pan.
- Take your marinated beef jerky out of the refrigerator and place the strips on top of the cooling racks. Do not pat dry the meat, as this will remove flavor.
- Insert a probe thermometer into one thick piece of jerky, ensuring it reaches the thermal center.
- Put the jerky-laden baking pan into the preheated oven on the middle rack.
- Monitor the internal temperature of the thickest piece of jerky. It should reach 158F in approximately 10 minutes.
Once you have completed the pre-heat treatment, you can then transfer the jerky to your dehydrator to remove moisture and complete the drying process. Set your dehydrator to a temperature between 130F and 160F and allow the jerky to dehydrate until it reaches your desired texture. Thinner pieces will typically take less time than thicker ones. Perform a bend test or check for dryness in cross-sections to determine when your jerky is done.
How to Make Beef Jerky in a Dehydrator
Making beef jerky in a dehydrator may seem like a complex process, but it is actually quite simple. Here is a complete guide on how to make beef jerky in a dehydrator:
First, choose a lean and affordable cut of beef, such as petite sirloin steaks or round roasts. Trim off any excess fat for better preservation.
Slice the meat against the grain into 1/8 – 1/4 inch thick strips. Slicing the partially frozen meat makes it easier to get consistent cuts.
Prepare a marinade using ingredients like salt, sugar, and other seasonings of your choice. Add water to the marinade based on the weight of the meat (40% of the meat’s weight). Calculate the salt amount using 2.25-2.5% of the total weight of meat and water.
Combine the sliced meat with the marinade in a ziploc bag and marinate overnight or for at least 2 hours.
Preheat your oven to 325-375°F and place the marinated jerky on an oven safe cooling rack over a baking sheet lined with aluminum foil. Preheat the jerky until it reaches an internal temperature of 158°F for about 10 minutes.
In the meantime, preheat your dehydrator to 140°F or within the range of 130-160°F. Once preheated, transfer the heat-treated jerky onto dehydrator trays without overlapping them.
Dehydrate the jerky in the dehydrator for several hours, checking its doneness periodically by performing bend tests and observing its appearance (dry cross-section with spider webbing indicates it is done).
Once the jerky is fully dehydrated, remove it from the dehydrator and allow it to cool before storing in airtight containers.
Enjoy your homemade beef jerky made in a dehydrator!
How to Tell When the Beef Jerky is Done
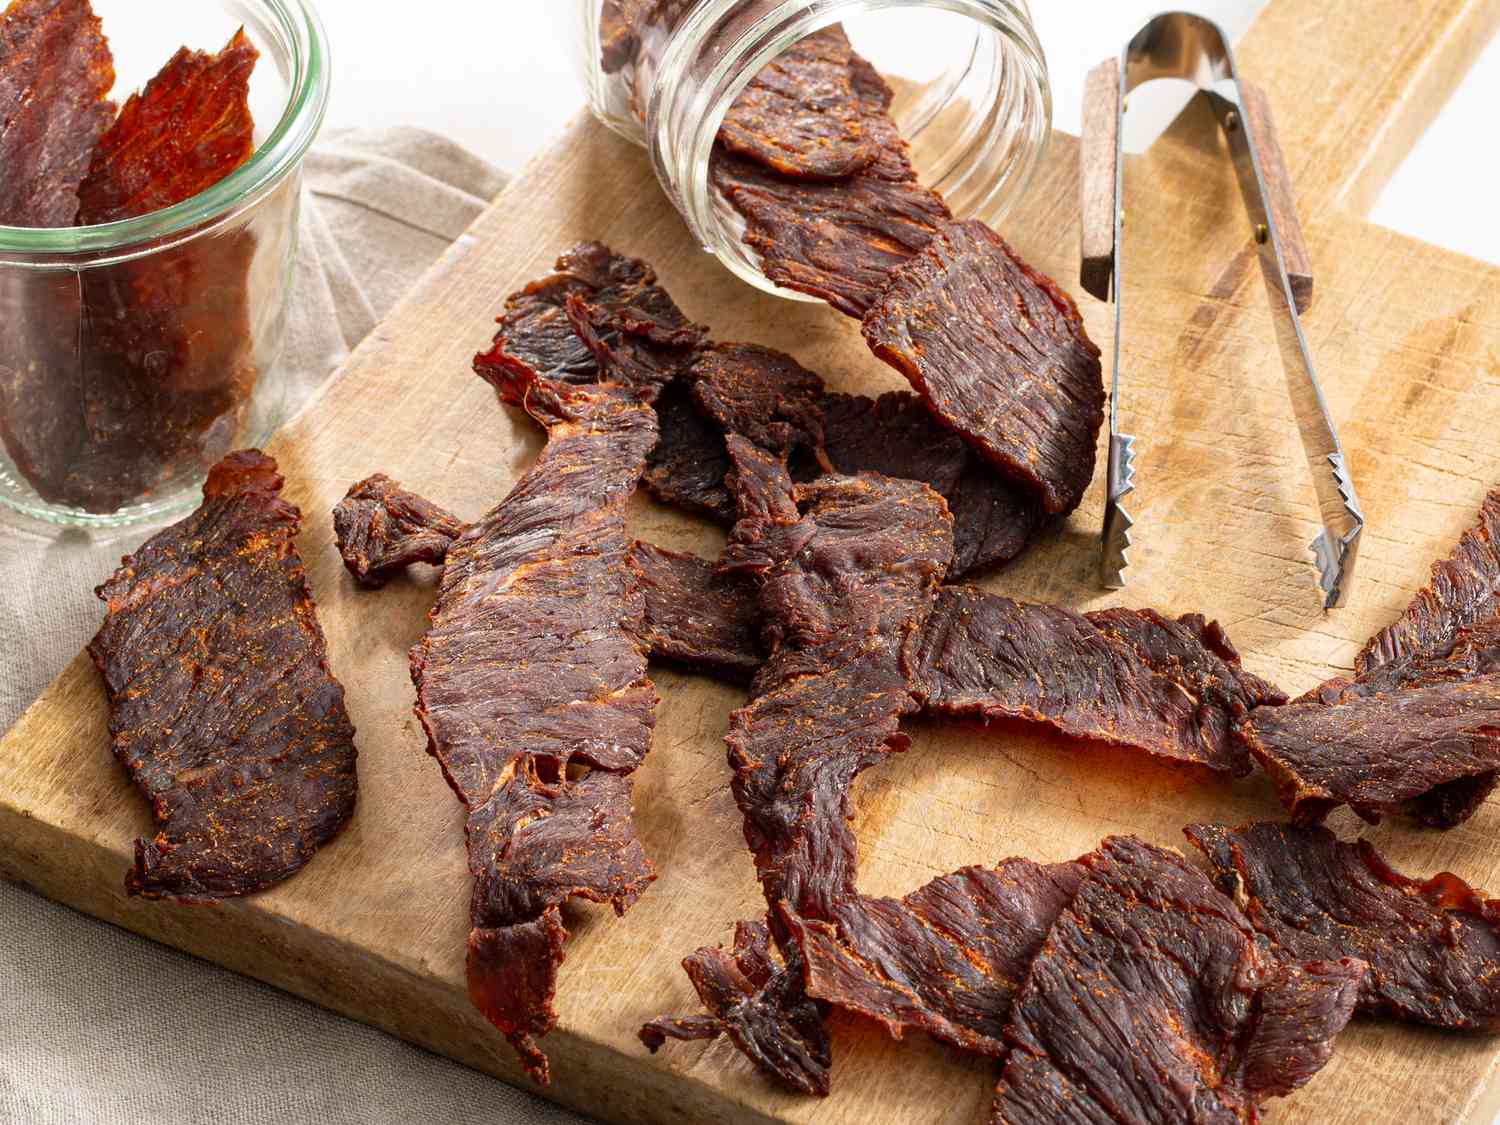
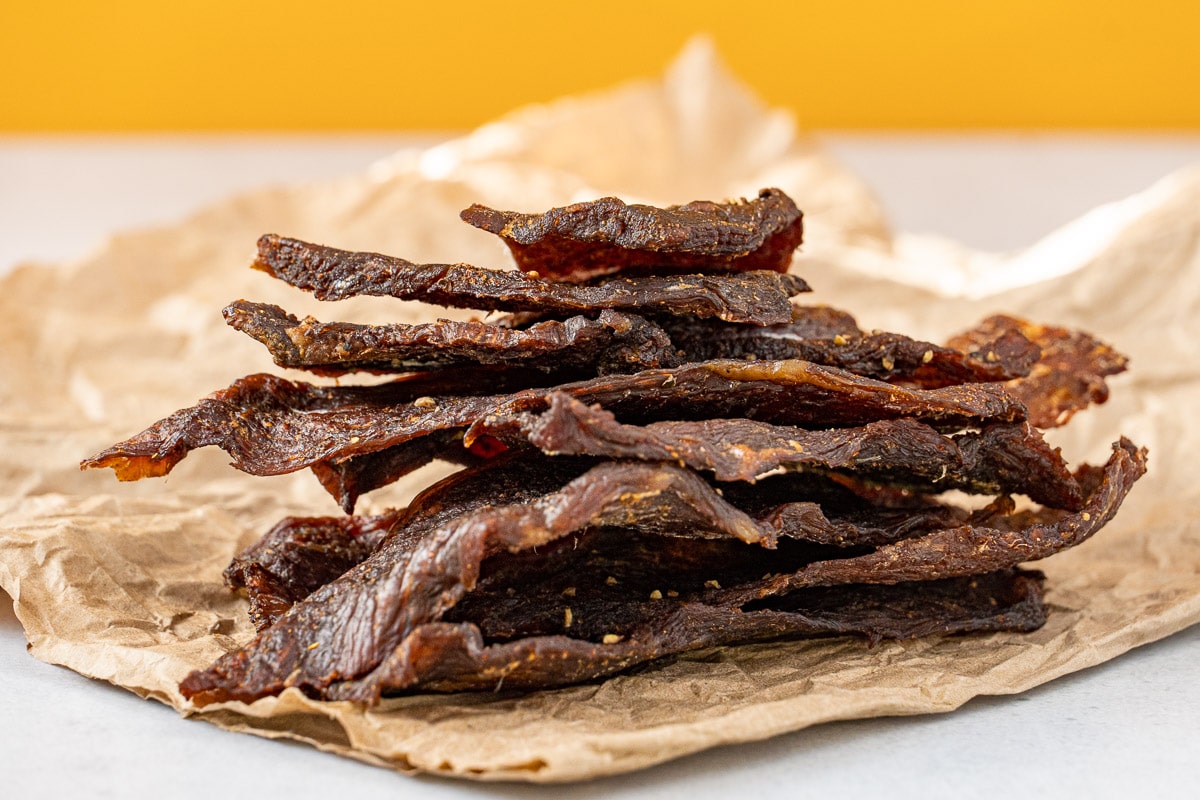
When determining if your beef jerky is done, there are a few key indicators to look for. Firstly, the jerky should have a dry texture and should not feel wet or rubbery. You can check this by breaking a piece in half and examining the cross-section. If it appears dry and features “spider webbing,” then it is likely done.
Another way to determine if your beef jerky is finished is through the bend test. Take smaller pieces of jerky that you suspect may be done and allow them to cool. Then, try bending the jerky. If it bends easily without breaking or cracking, it may need more drying time. However, if it snaps or breaks, then it is likely finished.
Remember that the drying time for beef jerky can vary depending on factors such as thickness and the type of dehydrator used. It’s important to regularly check on your jerky during the drying process and use these visual cues to determine when it is ready.
Cool Down in a Bag with the Lid Open
After the beef jerky has finished dehydrating, it’s important to allow it to cool down before storing it. One method is to place the jerky in a paper bag with the lid open. This allows any remaining moisture to escape and prevents condensation from forming inside the bag. The open lid also helps to prevent the jerky from becoming overly dry.
During this cooling process, it’s important to periodically check on the jerky and give it a gentle shake or stir to ensure that all sides are exposed to air. This helps to evenly distribute any residual moisture and promotes even drying.
The cooling process typically takes anywhere from 1-2 hours, depending on the thickness of the jerky. Thicker pieces may take longer to cool down completely. Once cooled, you can transfer the beef jerky into airtight containers or ziplock bags for storage.
It’s worth noting that proper storage is crucial for maintaining the freshness of beef jerky. Store it in a cool, dark place away from direct sunlight or heat sources. When stored correctly, homemade beef jerky can last up to several weeks or even months.
Overall, following these steps for cooling down and storing your homemade beef jerky will ensure that it remains fresh and delicious for as long as possible.
Sweet-Chili Beef Jerky
The sweet-chili beef jerky recipe used in this article is a flavorful and delicious option for homemade jerky. Here are the ingredients and quantities needed for approximately 0.5 – 0.75 lbs of jerky meat:
- – 279.8g sliced beef jerky meat (preferably lean cuts like petite sirloin steaks or top round)
- – 112.2g water
- – 8.82g Kosher salt (2.25% of the meat + water weight)
- – 1 tablespoon brown sugar
- – 1 tablespoon soy sauce
- – 1 tablespoon sweet chili sauce
- – 1 teaspoon garlic powder
- – 1 teaspoon onion powder
- – Optional: additional spices or seasonings to taste (e.g., chili flakes, cayenne pepper, paprika)
To prepare the marinade, combine all the above ingredients except for the water and salt in a bowl and mix thoroughly. In a separate container, weigh out the water according to the meat’s weight (40% of the meat’s weight) and add in the calculated amount of Kosher salt (2.25% of the combined meat + water weight). Stir until the salt dissolves.
Equipment
To make beef jerky in a dehydrator, you will need the following equipment:
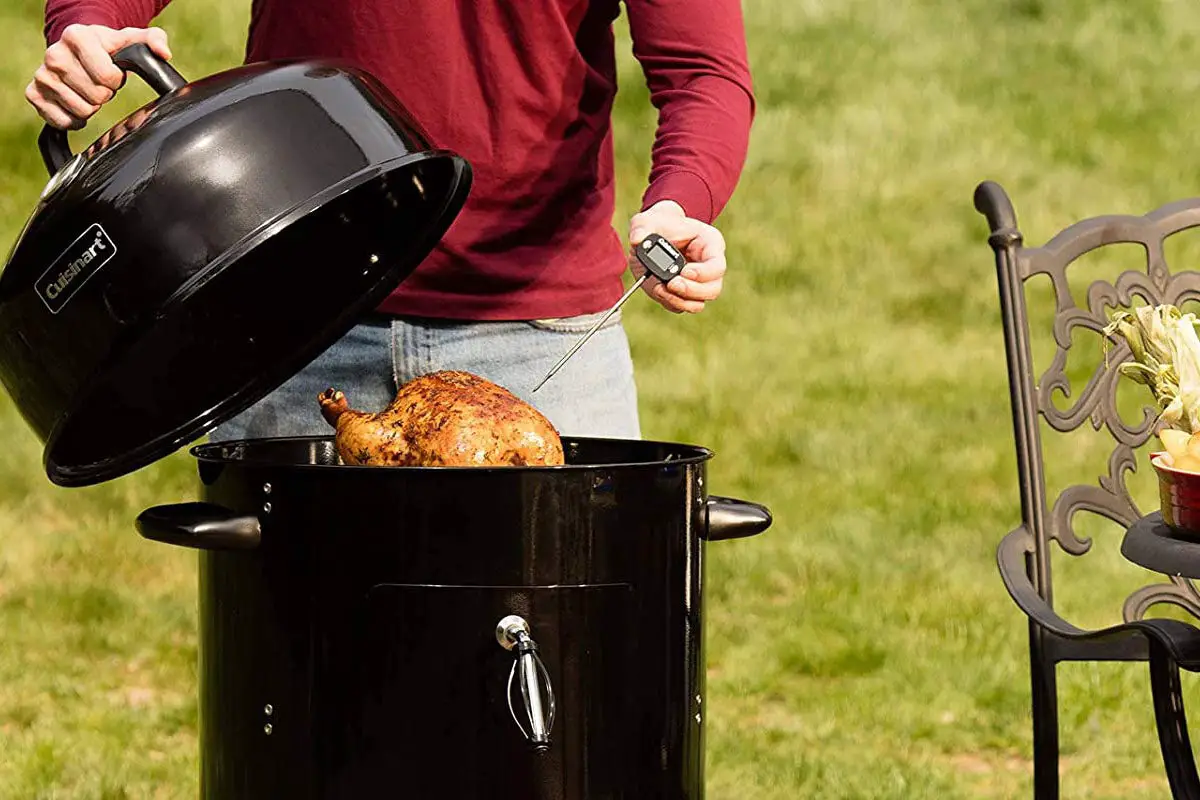
1. Dehydrator: A dehydrator is essential for removing moisture from the meat and preserving it. It allows for even drying and prevents the growth of bacteria.
2. Oven: Pre-heating the beef jerky to an internal temperature of 158F is important for killing bacteria before dehydrating it. An oven can be used for this pre-heat treatment.
3. Baking Sheet and Cooling Racks: These are needed for pre-heating the jerky in the oven. The baking sheet should be covered with aluminum foil to make clean-up easier.
4. Ziploc Bags: Ziploc bags are used for marinating the sliced meat. Double bagging is recommended to prevent leaks.
5. Probe Thermometer: A probe thermometer is necessary to monitor the internal temperature of the jerky during pre-heating.
6. Knife and Cutting Board: You will need a sharp knife and cutting board to slice the meat into thin strips.
To make beef jerky in a dehydrator, you will need the following ingredients:
1. Lean Beef: Choose a lean and cheap cut of beef, such as petite sirloin steaks or round roasts.
2. Marinade Ingredients: The marinade can be customized based on your preferences, but most recipes include salt, sugar, soy sauce or teriyaki sauce, and various seasonings like garlic powder, onion powder, or chili powder.
3. Water: Water is needed to create a brine solution that helps kill microbes and enhance flavor penetration.
The process of making beef jerky in a dehydrator involves the following steps:
1. Choose the right cut of meat: Opt for lean and cheap cuts that lack intramuscular fat.
2. Slice the meat: Cut the meat into thin strips, around 1/8 – 1/4 inch thick, against the grain for tender jerky or with the grain for chewier jerky.
3. Prepare the marinade: Combine salt, sugar, soy sauce or teriyaki sauce, and other seasonings to create a flavorful marinade.
4. Marinate the meat: Place the sliced meat in a ziploc bag and pour in the marinade. Allow it to marinate overnight or at least for 2 hours.
5. Pre-heat treat in the oven: Pre-heat the jerky in an oven at 325F-375F until it reaches an internal temperature of 158F to kill bacteria.
6. Dehydrate in the dehydrator: Set your dehydrator to around 140F and arrange the pre-heated jerky on trays without overlapping. Dehydrate until done, which can take around 3-5 hours depending on thickness.
7. Test for doneness: Use the bend test to check if the jerky is dry and has spider webbing texture indicating it is done.
8. Store and enjoy: Once cooled, store your homemade beef jerky in an airtight container or resealable bags for longer shelf life.
Note: This is just a summary of the process; refer to the article mentioned in this topic for more detailed instructions and pictures.
Ingredients
– Lean and cheap cuts of beef, such as petite sirloin steaks, top round, or london broil
– Marinade ingredients: salt, water, sugar, and other flavorings like soy sauce or teriyaki sauce
– Optional: curing salt for added preservation
Marinade
To make a marinade for beef jerky, you can use a variety of ingredients to achieve different flavors. Most recipes will include salt as a curing agent, but you can also add other seasonings like sugar, soy sauce, teriyaki sauce, or spices to enhance the taste. The goal of the marinade is to kill microbes and add flavor to the meat.
Before marinating the meat, it’s important to slice it properly. For tender and soft jerky, slice the meat against the grain. This means slicing perpendicular to the muscle fibers. Slicing when the meat is somewhat frozen makes it easier to achieve thin slices. Aim for a thickness of 1/8 – 1/4 inch for palatability and faster dehydration.
Before using a dehydrator, it is recommended to pre-heat treat the beef jerky in an oven at an internal temperature of 158F (70C). This process ensures that harmful bacteria are killed instantly and reduces the risk of contamination. Pre-heating takes about 10 minutes in an oven set at 325F-375F (163C-191C). It is a crucial step for food safety and doesn’t affect the taste of the jerky.
After pre-heat treating, transfer the beef jerky strips onto dehydrator trays without overlapping them. Set your dehydrator to a temperature between 130F-160F (54C-71C) and allow the meat to dehydrate until it reaches your desired texture. Thinner pieces will take less time than thicker ones. Check on the jerky after approximately 3 hours, and continue dehydrating until it feels dry and has a cross-section with “spider webbing.” This indicates that the jerky is done and ready to be enjoyed.
Note: The information provided here is a summary of the article’s content. For a more detailed guide on making beef jerky in a dehydrator, please refer to the original article.
Instructions
1. Choose a lean and affordable cut of beef, such as top round or london broil. Slice the meat against the grain into 1/8 – 1/4 inch thick strips.
2. Prepare a marinade using ingredients like soy sauce, teriyaki sauce, salt, sugar, and other spices of your choice. Combine the marinade ingredients and mix thoroughly.
3. Place the sliced meat in a ziplock bag and pour the marinade over it. Remove any air from the bag and seal it tightly. Marinate the meat in the refrigerator for at least 2 hours or overnight for optimal flavor.
4. Preheat your oven to 325F-375F. Cover a baking sheet with aluminum foil and place oven-safe cooling racks on top of it. Arrange the marinated beef jerky strips on the racks, ensuring they do not overlap.
5. Insert a probe thermometer into one thicker piece of jerky to reach the thermal center. Bake the jerky in the preheated oven for about 10 minutes or until it reaches an internal temperature of 158F.
6. While the jerky is preheating in the oven, start your dehydrator and set it to 140F-160F. Once the heat treatment is complete, transfer the jerky to the dehydrator trays, making sure none of them overlap.
7. Close the dehydrator door and allow the jerky to dehydrate for several hours, checking periodically for doneness. Thinner pieces may be ready in as little as 3 hours, while thicker pieces may take longer.
8. To test for doneness, remove a small piece of jerky from the dehydrator and let it cool. Bend the jerky and check for a dry cross-section with spider webbing. If it appears wet or rubbery, continue dehydrating.
9. Once the jerky is completely dehydrated and feels done, remove it from the dehydrator and let it cool before storing in airtight containers or resealable bags.
Follow these steps to make your own delicious beef jerky at home using a dehydrator.
Slicing the Jerky Meat
When it comes to slicing the jerky meat, it’s important to consider the type of jerky you prefer. If you like tender and soft jerky, slice against the grain of the meat. This means cutting perpendicular to the lines or muscle fibers on the meat. For example, if you’re using petite sirloin steaks, which have vertical lines running through them, you would slice horizontally to cut against the grain.
It’s also recommended to slice the meat when it’s somewhat frozen, as this makes slicing easier. Aim for a thickness of around 1/8 – 1/4 inch for your slices. This thickness ensures both palatability and shorter dehydration time in your dehydrator. Additionally, leave one piece slightly thicker so that you can probe it with a thermometer during the pre-heat treatment.
Overall, understanding how to properly slice your jerky meat is crucial for achieving the desired texture and flavor in your beef jerky.
Create Jerky Marinade and Marinate Jerky
To create a jerky marinade, you’ll need to combine various ingredients such as soy sauce, teriyaki sauce, salt, sugar, and other spices. The goal of the marinade is to add flavor and kill microbes on the meat. You can customize the marinade to your preference by adjusting the amount of salt or adding different spices.
After slicing the beef into thin strips, weigh it and calculate 40% of its weight in water. This will be used to create the brine for the marinade. Combine the measured water with kosher salt to achieve a salinity percentage of 2.25-2.5% of the meat and water weight. You can then mix in other soluble ingredients like sugar to balance out the saltiness.
Place the sliced beef into a ziploc bag and pour in the marinade mixture. Remove as much air as possible from the bag before sealing it. It’s recommended to marinate the jerky overnight for maximum flavor penetration. However, if you’re short on time, a minimum marination time of 2 hours is sufficient for salt penetration.
Write 2-3 paragraphs and list max 1500 characters if possible for the subheading.
Example:
Paragraph
Do this for each paragraph, in English language.
Pre-heating Jerky for Lethality
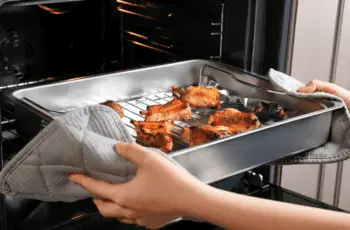
Pre-heating jerky for lethality is an important step in the process of making beef jerky in a dehydrator. Before putting the jerky into the dehydrator, it is recommended to pre-heat it to an internal temperature of 158F in an oven. This preheating process ensures that any harmful bacteria present in the meat are instantly killed, achieving a 7log reduction.
To pre-heat the jerky, start by placing your marinated beef strips on oven-safe cooling racks on top of a baking sheet covered with aluminum foil. There is no need to pat the meat dry with paper towel, as the ingredients in the marinade are surface treatments and will not penetrate the meat. Place a probe thermometer into one of the thicker pieces of jerky to monitor its internal temperature.
Preheat your oven to 325F-375F and put the baking pan with the jerky into the oven on the middle rack. It will take approximately 10 minutes for the jerky to reach an internal temperature of 158F. This preheating treatment ensures that any harmful bacteria are killed before proceeding to dehydration.
After pre-heating, transfer the jerky to your dehydrator and set it at a temperature between 130-160F. Ensure that none of the pieces overlap on the trays. The dehydration process will remove moisture from the meat, resulting in dried beef jerky. The time required for dehydration varies depending on factors such as thickness and desired texture, but checking after around 3 hours is recommended.
To determine if the jerky is done, perform a bend test by taking out smaller pieces and allowing them to cool before bending them. Fully dehydrated jerky will have a dry cross-section with “Spider webbing” patterns and should not have any hues of red or pink. It may take some trial and error to find your preferred level of doneness, as different cuts of meat and thicknesses will require varying dehydration times.
In conclusion, pre-heating jerky for lethality is an essential step in ensuring the safety of homemade beef jerky. By following the recommended preheating temperature and time, you can achieve a 7log reduction in bacteria before proceeding to dehydration in a dehydrator.
Dehydrating the Jerky
Dehydrating the Jerky:
Once the beef jerky has been pre-heat treated in the oven and reached an internal temperature of 158F, it is time to transfer it to the dehydrator for further drying. Start by preheating your dehydrator to 140F, although temperatures ranging from 130-160F will work as well.
Arrange the pre-treated jerky strips on the dehydrator trays, making sure that none of them overlap. It is important to allow enough space between the pieces for proper air circulation during the dehydration process. Close the door of the dehydrator and allow the meat to dry.
The duration of this drying process can vary depending on factors such as thickness of the jerky slices and personal preference for texture. Thinner slices will generally take less time than thicker ones. It is recommended to start checking for doneness after approximately 3 hours, especially if you have sliced the meat thin.
To determine if the jerky is done, you can perform a bend test. Take out smaller pieces that you suspect may be finished and allow them to cool. Bend these cooled pieces and examine their cross-sections. Fully dried jerky will have a dry cross-section with “spider webbing” patterns, indicating that all moisture has been removed.
It is important to note that there is no set time frame for how long this dehydration process will take, as it depends on various factors. However, most of the jerky in this article finished dehydrating at around 5 hours.
For more detailed information on this topic, be sure to refer to my more in-depth article on how to make beef jerky in a dehydrator.
Checking for Doneness
Checking for Doneness
To determine if your beef jerky is done, you can perform the bend test. Take out smaller pieces of jerky that you suspect might be finished and allow them to cool. Then, gently bend the jerky to see how it reacts.
If the jerky bends easily and feels moist or rubbery in the cross-section, it is not yet done and needs more time to dehydrate. On the other hand, if the jerky snaps and breaks when bent, with a dry cross-section featuring “spider webbing,” then it is likely done.
It’s important to note that determining doneness can vary depending on factors such as thickness and personal preference. Some pieces may finish earlier than others, so it’s best to check on your jerky after around 3 hours of dehydrating and continue checking until it reaches your desired texture.
In conclusion, the ideal temperature for dehydrating jerky is around 160°F (71°C). This temperature ensures that the meat is thoroughly dried while preserving its flavor and texture. It is important to maintain a consistent temperature throughout the process to prevent bacterial growth and ensure safe consumption. Properly dehydrated jerky can be enjoyed as a tasty and nutritious snack.
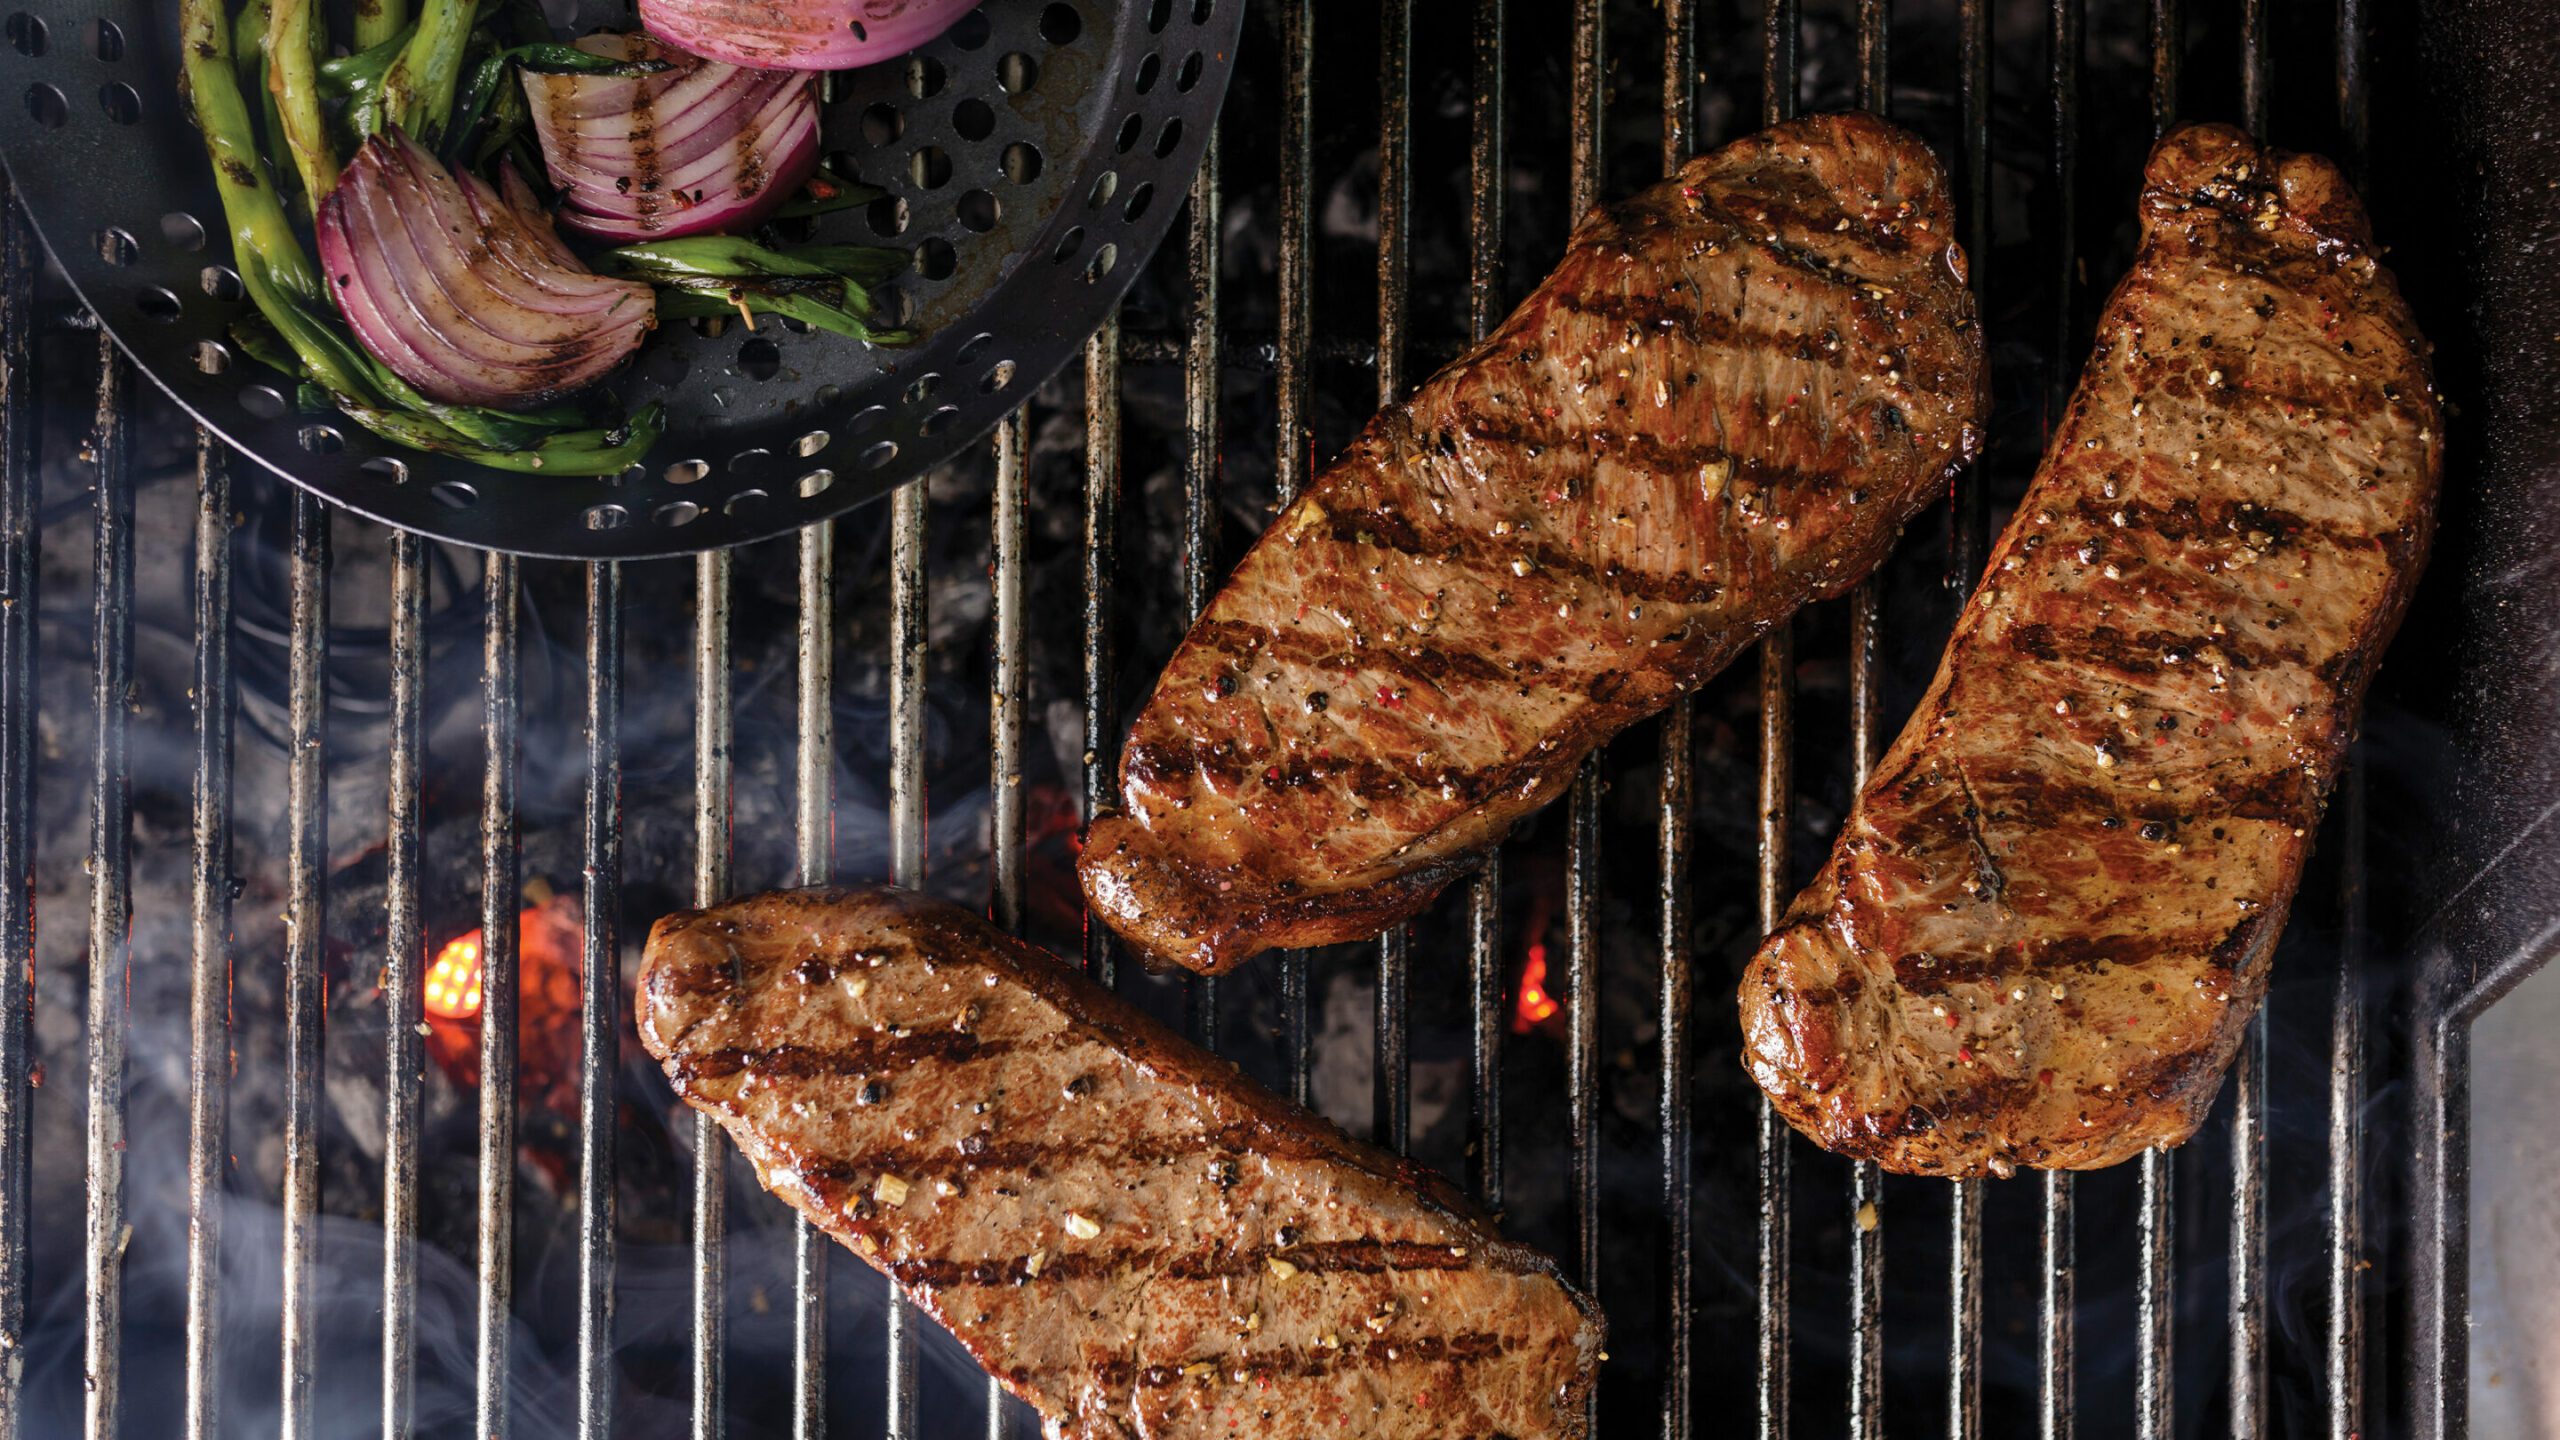
Learn More About Grilling
If you want to learn more about grilling, check out these other helpful resources!