“Discover the secret to perfectly tender and flavorful brisket as we unravel the optimal resting time. Learn how long to let your mouthwatering brisket rest, allowing the delectable flavors to meld and the juices to redistribute for an unforgettable dining experience. Master the art of patience and elevate your barbecue game with our expert tips.”
WHY REST A BRISKET?

Resting a brisket is crucial for achieving a tender and flavorful cut of meat. When you cook a brisket, the juices inside the meat are drawn to the center. If you cut into the brisket right away, those juices will escape, resulting in a dry and tough texture. Resting allows the juices to redistribute throughout the meat, resulting in a moist and flavorful brisket.
In addition to redistributing the juices, resting also allows the meat to relax, making it more tender and easier to slice. By giving your brisket enough time to rest, you can avoid ending up with a tough and chewy cut of meat.
MOST COMMON WAY TO REST A BRISKET
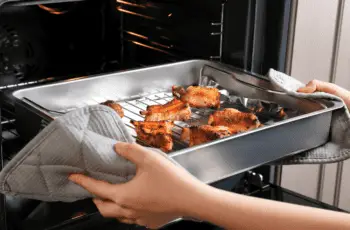
The most common way to rest a brisket is to remove it from the heat source once it is cooked. Then, wrap it tightly in foil or butcher paper to retain the heat and moisture. Place the wrapped brisket in a cooler or oven that is turned off but still warm. Let it rest for at least 30 minutes, allowing the juices to redistribute throughout the meat and making it moist and flavorful.
HOW LONG TO LET BRISKET REST
Resting a brisket is a crucial step in cooking it to perfection. By allowing the meat to rest after cooking, you can ensure that it’s moist, tender, and full of flavor. The ideal resting time for a brisket may vary depending on factors such as the size of the brisket, cooking method, internal temperature, ambient temperature, and resting place. However, as a general guideline, it is recommended to rest the brisket for at least 30 minutes per pound.
The size of the brisket plays a role in determining how long it needs to rest. A larger brisket will require a longer resting time to allow the juices to redistribute throughout the meat. The cooking method used also affects the resting time. Smoking a brisket retains heat longer than other methods like oven or stovetop cooking. Monitoring the internal temperature of the brisket is important as it helps determine when it’s ready to be removed from the heat source and start resting.
COMMON MISTAKES TO AVOID WHEN RESTING BRISKET
1. Cutting Too Soon – Cutting the brisket too soon after removing it from the heat source can cause the juices to escape, resulting in a dry and flavorless brisket. It’s best to wait at least 30 minutes before slicing the brisket.
2. Using the Wrong Type of Wrap- When resting the brisket, it’s essential to use the right type of wrap. Foil and butcher paper are the most popular options as they retain heat and moisture while allowing the meat to breathe.
3. Not Slicing Against the Grain – After resting the brisket, it’s essential to slice it against the grain. This makes the meat more tender and easier to chew. To identify the grain, look for the lines that run across the meat and cut perpendicular to them.
RESTING METHODS FOR BRISKET
1. Cooler Method: After wrapping the brisket in foil or butcher paper, place it in a cooler with towels or blankets to insulate it. This method can keep the brisket warm for several hours, allowing for more flexibility in timing.
2. Oven Method: Another resting method is to place the brisket in an oven set to the lowest possible temperature (around 150°F) and leave it for an hour or two. This method can keep the brisket warm while also allowing it to rest.
3. Holding in a Warming Drawer: If you have a warming drawer or a slow cooker, you can keep the brisket warm while it rests. Just make sure to keep an eye on the temperature to avoid overcooking.
TIPS FOR SLICING AND SERVING RESTED BRISKET
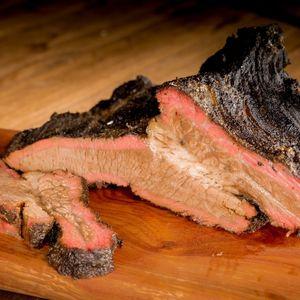
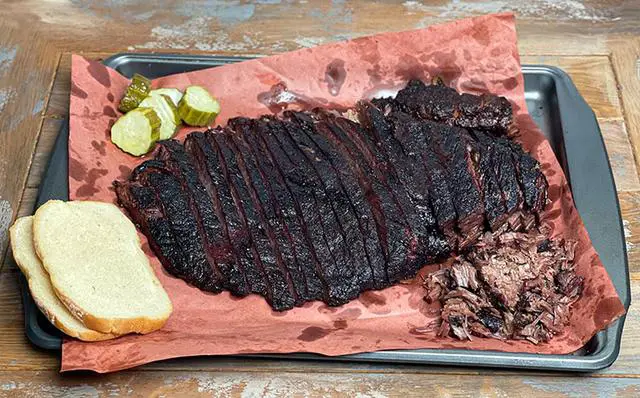
When it comes to slicing and serving rested brisket, there are a few key tips to keep in mind. First, make sure to slice the brisket against the grain. This means cutting perpendicular to the muscle fibers, which will result in a more tender and easier-to-chew piece of meat.
Next, aim for uniform slices that are about 1/4 to 1/2 inch thick. This ensures that each piece has a consistent texture and flavor. Arranging the slices on a platter can also enhance the presentation of your brisket. Start by laying down a bed of fresh herbs, such as parsley or cilantro, for added color and freshness. Then fan out the slices in a single layer, slightly overlapping them. Drizzle any leftover juices or sauce over the top for added flavor.
Lastly, consider serving your brisket with complementary sides. Classic BBQ sides like coleslaw, baked beans, and cornbread are always crowd-pleasers. For a healthier option, pair your brisket with a side salad or roasted vegetables. By following these tips, you’ll ensure that your sliced and served brisket is tender, juicy, and full of flavor.
THE TAKEAWAY
Resting a brisket is crucial for achieving a moist, tender, and flavorful cut of meat. By allowing the brisket to rest, the juices redistribute throughout the meat and make it easier to slice. The ideal resting time for a brisket can vary depending on factors such as size, cooking method, internal temperature, ambient temperature, and resting place. It’s important to avoid common mistakes like cutting the brisket too soon or not using the right type of wrap. Different resting methods, such as using a cooler or oven, can yield excellent results. When serving brisket, remember to slice against the grain and arrange the slices on a platter with complementary sides for a delicious meal.
In conclusion, allowing brisket to rest after cooking is crucial for optimal flavor and tenderness. A resting period of at least 30 minutes allows the juices to redistribute, resulting in a more succulent and delicious final product. Patience during this step ensures a truly satisfying dining experience.
Learn More About Grilling
If you want to learn more about grilling, check out these other helpful resources!


