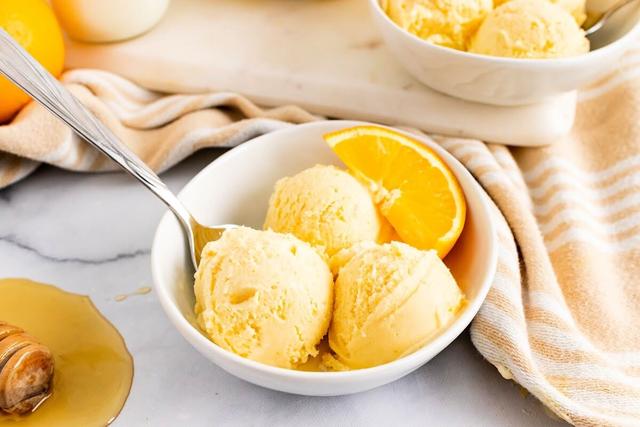
Introducing “Orange Creamsicle Ice Cream”: A delectable blend of tangy oranges and creamy goodness, this frozen treat is the perfect balance of citrusy sweetness. Indulge in the nostalgic flavors of your favorite childhood popsicle, now in a rich and velvety ice cream form. Savor every scoop as you embark on a refreshing and delightful journey with our Orange Creamsicle Ice Cream.
Orange Creamsicle Ice Cream

If you love the combination of vanilla and orange-flavored ice cream, you’re going to flip over this homemade Orange Creamsicle Ice Cream. It uses a custard-style base (with eggs) to make a creamy, deliciously scoopable homemade ice cream that’s just as good as in your childhood memories. This recipe allows you to create two different parts – a vanilla base and an orange base – which are swirled together to give you the classic “orange creamsicle” outcome.
To make this ice cream, you’ll need an ice cream maker. Make sure to freeze the barrel of the ice cream maker at least a day ahead so it’s good and frozen by the time you want to use it. The custard-style base for this ice cream includes egg yolks, which add flavor, prevent ice crystallization, and create a smooth and creamy texture. The same egg-based custard ice cream base can also be used for other flavors like chocolate chip, cookies and cream, and mint chocolate chip.
The recipe calls for milk, heavy cream, salt, sugar, egg yolks, vanilla extract or vanilla bean, oranges (zest and juice), and optional additional flavorings like orange juice concentrate or other fruits. You’ll simmer the milk mixture with half of the sugar until slightly thickened, then temper the eggs by slowly adding some of the hot milk mixture into them before combining everything back in the saucepan. After straining and cooling the custard base, you’ll divide it into two bowls – one for the vanilla base with added heavy cream and vanilla extract/bean, and one for the orange base with added orange zest and juice. Refrigerate both bases until cold.
Ingredients You Need
This homemade Orange Creamsicle Ice Cream recipe requires the following ingredients:
- 2 cups (473 ml) heavy cream or half and half, divided
- 1 cup (237 ml) whole milk
- 1/4 teaspoon salt
- 3/4 cup (150 g) granulated sugar
- 4 large egg yolks
- 1 tablespoon vanilla extract
- Zest of 1 large orange
- Juice of 2 large oranges
Don’t Forget the Ice Cream Scoop!
Don’t Forget the Ice Cream Scoop!
When it comes to enjoying a bowl of homemade ice cream, having a good ice cream scoop is essential. The author of this recipe recommends using a heavy-duty stainless steel scoop that is easy to grip and makes scooping the ice cream a breeze. They even provide a link to their favorite scoop.
Using the right scoop can make all the difference in serving up perfect scoops of creamy ice cream. It ensures that each serving is uniform in size and shape, making for an aesthetically pleasing presentation. Plus, it makes serving and enjoying the ice cream much easier and more enjoyable.
So, if you’re planning on making this delicious Orange Creamsicle Ice Cream or any other homemade ice cream recipes from this collection, don’t forget to invest in a high-quality ice cream scoop. It’s a small but important tool that will elevate your ice cream experience.
How to Make Orange Creamsicle Ice Cream

To make Orange Creamsicle Ice Cream, start by combining milk, heavy cream, salt, and sugar in a saucepan over medium heat. Bring the mixture to a simmer and then remove it from the heat. In a separate bowl, whisk together egg yolks and sugar. Slowly add some of the milk mixture to the egg mixture to temper the eggs. Pour the entire egg mixture back into the saucepan with the milk mixture and simmer until slightly thickened. Strain the mixture through a sieve and let it cool.
Once cooled, divide the mixture into two bowls. In one bowl, add vanilla and remaining heavy cream to create the vanilla base. In the other bowl, add orange zest and orange juice to create the orange base. Refrigerate both mixtures for at least two hours until cold.
Next, churn each base separately in an ice cream maker for about 15 minutes until thickened. Transfer the vanilla ice cream to one side of a freezer-safe container and freeze. Then pour in the orange base into the ice cream maker without washing it in between churnings. Churn until thickened and transfer it to the other side of the container.
If desired, swirl both flavors together slightly before freezing for at least 3 hours to set before serving.
Note: This recipe requires an ice cream maker but can be made without one by freezing half of the heavy cream mixture in ice cube trays until solid. Blend with remaining heavy cream when ready to eat.
Experiment with different combinations of milk or cream products for varying levels of creaminess in your ice cream. Eggs are important for flavor, preventing crystallization, and creating a smooth texture.
Feel free to customize this recipe by replacing oranges with other fruits or flavorings such as peaches or strawberries.
Investing in an ice cream maker can greatly enhance your homemade ice cream experience, but you can still make this recipe without one using alternative methods mentioned above.
Overall, making Orange Creamsicle Ice Cream requires a few steps but is worth the effort for a creamy and delicious treat reminiscent of childhood memories.
Step One: Heat the Ice Cream Base
Step One: Heat the Ice Cream Base
In a saucepan over medium heat, combine the milk, 1 ½ cups of the heavy cream, salt, and half the sugar. Stir the mixture constantly as you bring it just to a simmer (do not boil it). Once it’s steaming, remove it from the heat.
To temper the eggs, slowly add 1/2 cup of the milk mixture in a drizzle into the egg mixture. Do this slowly so as not to cook the eggs. Pour the entire egg mixture back into the saucepan with the milk mixture.
Simmer over medium heat, stirring constantly, until slightly thickened, about 5 minutes. Do not boil. Remove the pot from the heat.
Strain it through a fine mesh sieve into a bowl and let cool.
Once cooled, divide the mixture into two bowls. Pour the remaining 1/2 cup heavy cream and vanilla into one bowl to make the vanilla base. Pour the orange zest and orange juice into the other bowl to make the orange base.
Refrigerate both for at least two hours until cold. You will churn each base mixture separately, so pourthe vanilla base intothe ice cream maker and churn for 15 minutes. Transferthe vanilla ice cream to one side ofa freezer-safe container and freeze.
Next pourthe orange base intothe ice cream maker (no need to refreeze or wash in between). Churn untilthe ice cream is thick, about15-20 minutes. Transferthe orange ice cream tothe other side ofa freezer container.You can swirl them together slightly if desired.
Freezethe ice cream for at least3 hours to set before serving.
Step Two: Temper the Eggs
To temper the eggs, slowly add 1/2 cup of the milk mixture in a drizzle into the egg mixture. This is done slowly to prevent the eggs from cooking. Once you have added the milk mixture, pour the entire egg mixture back into the saucepan with the milk mixture. Simmer over medium heat, stirring constantly, until slightly thickened, about 5 minutes. It’s important not to let it boil. After simmering, remove the pot from heat and strain it through a fine mesh sieve into a bowl. Let it cool before moving on to the next step.
Once the custard base has cooled, divide it into two separate bowls. In one bowl, add the remaining 1/2 cup of heavy cream and vanilla to create the vanilla base. In the other bowl, add orange zest and orange juice to create the orange base. Refrigerate both mixtures for at least two hours until they are cold.
You will then churn each base mixture separately in your ice cream maker. Start by pouring the vanilla base into the ice cream maker and churn for about 15 minutes. Once churned, transfer the vanilla ice cream to one side of a freezer-safe container and freeze.
Next, pour the orange base into your ice cream maker without needing to refreeze or wash in between churning sessions. Churn until the ice cream is thick, which should take about 15-20 minutes.
Finally, transfer the orange ice cream to the other side of your freezer container and swirl them together slightly if desired. Freeze for at least 3 hours before serving to allow it to set.
If you don’t have an ice cream maker, you can still make this recipe by mixing in only half of the heavy cream at first and reserving the rest. Pouring this mixture into ice cube trays and freezing until solid will allow you to blend it with remaining heavy cream when ready to eat.
Tempering the eggs is an important step in this recipe as it adds flavor, prevents ice crystallization, and creates a smooth and creamy texture. However, if you prefer to make ice cream without eggs, there are alternative recipes available that do not include them.
Feel free to experiment with different flavors and fruits by replacing the orange with your preferred choice. Additionally, investing in an ice cream maker like the Cuisinart 1.5 quart or ICE-70 Electronic Ice Cream Maker can greatly enhance your homemade ice cream-making experience.
Step Three: Make the Two Ice Cream Bases
Step Three: Make the Two Ice Cream Bases
To make the two bases for this Orange Creamsicle Ice Cream, you will need to separate the custard mixture into two bowls. In one bowl, add the remaining 1/2 cup of heavy cream and vanilla extract to create the vanilla base. In the other bowl, mix in the orange zest and freshly squeezed orange juice to make the orange base.
Refrigerate both bases for at least two hours until they are cold. This step is important as it allows the flavors to meld together and ensures a creamy texture when churned.
Once chilled, you will churn each base separately in your ice cream maker. Start by pouring the vanilla base into the machine and churning for about 15 minutes until thickened. Transfer the vanilla ice cream to one side of a freezer-safe container and place it in the freezer.
Next, pour the orange base into the ice cream maker without needing to refreeze or wash it in between. Churn until the orange ice cream reaches a thick consistency, usually around 15-20 minutes. Transfer this orange ice cream to the other side of your freezer container.
If desired, you can lightly swirl together both flavors for a marbled effect before freezing them. Finally, let the ice cream set in the freezer for at least three hours before serving.
Note: If you prefer an entirely mixed flavor throughout your Orange Creamsicle Ice Cream, rather than distinct vanilla and orange sections, you can skip making two separate bases and simply combine all ingredients into one mixture before churning.
Step Four: Churn the Ice Cream
To churn the ice cream, start by pouring the vanilla base into the ice cream maker and churn it for 15 minutes. Once the vanilla ice cream is thick, transfer it to one side of a freezer-safe container and freeze it.
Next, pour the orange base into the ice cream maker (no need to refreeze or wash in between) and churn it until the ice cream is thick, which should take about 15-20 minutes. Transfer the orange ice cream to the other side of the freezer container. You can swirl them together slightly if desired.
Finally, freeze the ice cream for at least 3 hours to set before serving. This step is important to ensure that your homemade Orange Creamsicle Ice Cream has a creamy and scoopable texture. Enjoy!
Milk vs Cream

When it comes to making ice cream, there is a debate about whether to use milk or cream. The choice between the two can affect the texture and richness of the final product. In this recipe for Orange Creamsicle Ice Cream, the author recommends using a combination of half and half and whole milk. This combination provides a good balance of fat content for a creamy texture. However, if you prefer a richer and creamier ice cream, you can use heavy whipping cream instead.
It’s important to note that using lower-fat milks like 2% or skim milk may result in a less creamy and more icy texture. Whole milk is recommended for the best results. Additionally, egg yolks are used in this recipe to add flavor, prevent ice crystallization, and create a smooth and creamy texture. If you prefer to make ice cream without eggs, there are alternative recipes available.
Overall, the choice between milk and cream depends on personal preference and desired texture. Experimenting with different combinations can help you find the perfect balance for your homemade ice cream creations.
Frequently Asked Questions

1. Does this ice cream have to be made in an ice cream maker?
No, you can still make it without an ice cream maker. Simply pour the mixture into ice cube trays and freeze until solid. When ready to eat, add the ice cream cubes to a blender with the remaining heavy cream and blend until smooth.
2. Can I add flavoring to the ice cream besides orange?
Yes, you can leave out the orange and replace it with any other fruit or flavoring you like. Some suggestions include fresh ripe peaches, strawberries, blueberries, or mango.
3. Can I make this recipe in one base instead of two?
Yes, if you don’t mind having a mixed orange vanilla flavor, you can combine both bases into one mixture and churn it once.
4. Can I use milk or cream interchangeably in this recipe?
Yes, you can use different combinations of milk and cream depending on your preference. Whole milk and half and half are recommended for a creamy texture, but you can experiment with different combinations to find what you like best.
5. Why are eggs used in this recipe?
Eggs add flavor, prevent ice crystallization, and create a smooth and creamy texture in the ice cream.
Does this ice cream have to be made in an ice cream maker?
This ice cream recipe is made in an ice cream maker, but it is possible to make it without one. If you don’t have an ice cream maker, you can pour the mixture into ice cube trays and freeze until solid. Then, blend the frozen cubes with the remaining heavy cream until smooth. While using an ice cream maker will result in a creamier and faster freezing process, you can still achieve a delicious homemade ice cream without one.
Do I have to add eggs to the ice cream?
No, you don’t have to add eggs to the ice cream. While this specific recipe uses a custard-style base with eggs, there are other ice cream recipes that don’t require eggs. In fact, the article even provides a link to a vanilla ice cream recipe that doesn’t include eggs. So if you prefer not to use eggs in your ice cream, you have options.
Can I add flavoring to the ice cream besides orange?
Yes, you can add flavoring to the ice cream besides orange. The recipe provided is for Orange Creamsicle Ice Cream, but you can modify it by replacing the orange zest and juice with any other fruit or flavoring that you prefer. For example, you could use fresh ripe peaches, strawberries, blueberries, or mango. Feel free to experiment with different flavors to create your own unique ice cream creations.
When adding additional flavorings, simply substitute the orange ingredients in the recipe with your desired flavor. You can adjust the quantity of the flavoring to taste, keeping in mind that some flavors may require more or less than others for optimal taste. Be sure to refrigerate both base mixtures (the vanilla and the flavored) before churning them separately in the ice cream maker.
By customizing the flavorings, you can create a variety of delicious homemade ice creams to suit your preferences and cravings.
In conclusion, orange creamsicle ice cream is a delightful treat that combines the refreshing taste of oranges with creamy goodness. Its nostalgic flavors and vibrant colors make it a favorite among both children and adults. Whether enjoyed on a hot summer day or as a sweet indulgence, this citrus-infused dessert never fails to satisfy cravings and bring smiles to faces.
https://www.youtube.com/watch?v=QdhaEQbZbX8&pp=ygUbb3JhbmdlIGNyZWFtc2ljbGUgaWNlIGNyZWFt
Learn More About Grilling
If you want to learn more about grilling, check out these other helpful resources!